Showing posts with label pinterest. Show all posts

Thursday, October 1, 2015

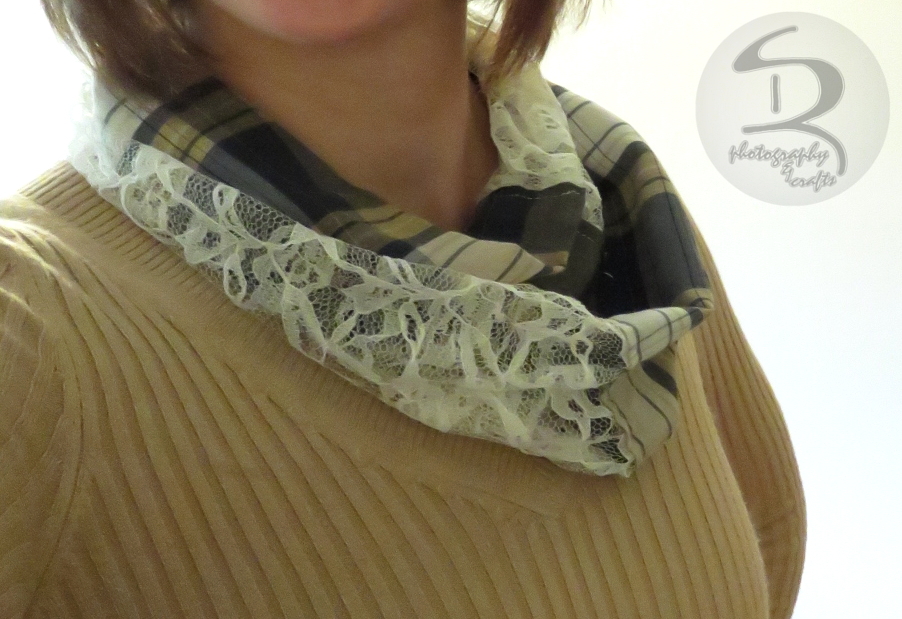
Plaid & Lace Scarf

Fall is for scarves and boots... yep.

Although, I like knitting a good fall/winter scarf, this year I was inspired by some plaid/lace and plaid/polka dot scarves I found while browsing Pinterest.

Here's how my first one turned out!


I started out by visiting my area thrift stores, hoping to find some good flannel shirts for cheap and maybe some old lacy shirts, too. While I didn't find any flannel plaid, I didn't leave disappointed.
Just check out these fashionable shirts! (Ok, I honestly, kind of like the second one in... maybe because is actually fits. I might not cut it up after all...)


These prints are gonna be great for fall! 
(Can you see the detail on the navy blue one? It's got little stitched in dots.)


After having finished the first scarf, I know that I definitely want to make the next ones bigger. The shirts might have enough material, but I think I'll check out Joann's for some real flannel and more lace!

Still, from 80's shirts to today's scarf... I'm happy with it!

Thursday, January 22, 2015

Knit Scarf #3

So, I started this scarf back in October...
I know I've mentioned before about how long I can take to finish a project. This time, though, I wanted to try something other than a straight knit scarf (see the others I've made
here and here); and I wanted to make a real infinity scarf.


I found two beautiful skeins of yarn at my local Thrift Store for only 50¢ each! Since I'd already started thinking about knitting an infinity scarf, I couldn't resist the rich colors.

It's kind of funny how people relate knitting to Grandmas, but the more I talk about knitting, the more I find out my own friends knit! In fact, I got this idea in my head from a friend.
She was wearing a gorgeous, red scarf that I loved; after expressing my thoughts, she stated she knit it herself. I exclaimed how beautiful the ribbing was and she shrugged saying, "It's just knit 2, purl 2."

I had to watch a lot of YouTube videos to teach myself a bit more about knitting! I discovered that I had been doing a purl stitch very incorrectly - no wonder I had avoided it for so long - it really wasn't nearly as difficult as I had thought.

The yarn I had bought is a very fluffy, curly yarn and I couldn't see the results quickly to tell if I was knitting the rows correctly. I decided to just practice the ribbing on some regular yarn first, til I was confident.

Then I was distracted by other knitting tutorials on YouTube... and I practiced knitting a cable - 


This was all in the first night of starting my infinity scarf and I was determined to see the ribbing on the scarf before I went to bed. It took several rows and monotonous counting ("knit 2, purl 2, knit 2, purl 2...") until I saw that it was definitely ribbing. I was so excited that I shared this photo on Facebook -                               

Over the next couple days, I added in the second color, watched videos on how to carry up the color (so that I wasn't knotting it and cutting every time I switched back), and thought it was looking great!

For a couple weeks, I knit several rows a day, while watching movies or TV shows; but once I started decorating for the holidays, the needles and yarn moved into my craft room for hibernation.

Finally, I pulled the project back out and sat down to finish it! I bought another skein of the purple with a Christmas gift card I'd received; so I'm still saying this is my dollar scarf!


It's so soft and warm and comfy! I've worn it several times already - and needed it with the below zero temperatures we've had with wind chill!

I discovered a co-worker knitting something the other day during lunch break. When I asked, she said she was just starting a sweater!
We talked about knitting for a while and she left me with this, "Eventually, you'll get sick of doing just scarves and want to try something more challenging."
I can't say I'm quite there, but I did see a beautiful knit blanket on Pinterest that I see myself starting in the near future.

And you'll see a few new patterns I've pinned, if you check out my Pinterest board "Knit It!"
Follow Ruth's board Knit It! on Pinterest.

Thanks for reading!


Friday, October 17, 2014

Zucchini Banana Muffins

[This post is typed in pink in support of October being Breast Cancer Awareness Month.]

Last summer I couldn't pin enough new zucchini recipes to keep up with my zucchini plants. This summer, I was getting zucchini from my sister, since my plants didn't do well at all. This is a wonderful recipe that I pinned from Jessica at "How Sweet It Is". Her blog is absolutely gorgeous, full of pictures that I don't even think to take when I'm baking (and I love taking pictures of food)!
This is my second time making these delicious, healthy muffins and I ended up adapting the recipe a bit this batch. I did some substitutions and additions and they came out great. I'm sharing the recipe that I ended up baking and the one picture I took.
But seriously, check out Jessica's blog and tasty pictures!
Whole Wheat Zucchini Banana Chocolate Chip Muffins | How Sweet It Is

If I were to put all the main ingredients in the title of this recipe, I would have to call them:
Whole Wheat Zucchini Banana Applesauce Walnut Chocolate Chip Muffins.


     3 c. whole wheat flour
     1 c. all purpose flour
     2 tsp. baking soda
     1/2 tsp. cinnamon
     1/2 tsp. salt
     
     2 large eggs
     2/3 c. packed brown sugar
     2/3 c. milk 
     1 Tbsp. vanilla extract 
     1/2 c. butter, softened (one stick)

     1 1/2 c. zucchini, grated (do not squeeze dry)
     2 small-medium bananas, mashed
     1 c. applesauce

     1 c. crushed walnuts
     1 c. chocolate chips

Mix the first 5 dry ingredients together and set aside.
In a large bowl, beat eggs and brown sugar until smooth. Add in milk, vanilla, and butter; mix until smooth. Stir in zucchini, bananas, and applesauce. Slowly, mix in the dry ingredients. Then add desired amount of walnuts and/or chocolate chips.
The zucchini and fruit measurements are an approximation of what I mixed in. If the batter appears thick or clumpy (mine did the first time I made it because I had packed the zucchini too much in the measuring cup), you can add more applesauce or milk til you see the right consistency. Applesauce is often used as a substitute for oil, so it will make the muffins more moist. If it seems too 'soupy' add a little more flour.
Line muffin tins with liners and fill about 2/3 - 3/4 full with batter.
Bake at 350°F for about 17 minutes or until golden brown and toothpick comes out clean.
Let muffins cool completely before eating.

These muffins make a quick, healthy breakfast. The recipe made about 30  muffins and I froze most of them so I can just grab a couple on my way to work when I don't have time for anything else.

Play with the ingredients to find what you like best - I've made similar muffins that also had carrots and raisins in them and couldn't believe how amazing they were packed with healthy foods! If you want some more zucchini recipes, check out my pinterest board "Eat It!"


Wednesday, October 1, 2014

Crock Pot Applesauce

I read somewhere that apples are fall's favorite fruit. 
I personally have a lot of "fall favorites" - it's the season with some of my favorite memories from growing up. One of those memories is of apple picking with my family. (I shared a great photo from 20 years ago on a previous entry - if you missed it, check it out in Tomato Sauce.) 
This year, it was just me and a friend, but I just wanted to pick apples for the tradition and enough to make some tasty crock pot applesauce! Of course I picked a few extra for eating; a few more for some apple crisp; oh, and a couple more for some amazing bread... and then a coworker shared a recipe for apple brownies (I know, what?! But they were delicious, more like a coffee cake than brownie). 
Oh, the unending choices of what to do with apples! Until work gets in the way...

Back to the applesauce...
I found a recipe on Pinterest (really, where else would I look?) for crock pot applesauce and while I don't find stove-top applesauce extremely difficult, I liked the idea of using a crock pot so that I didn't feel like I'd have to check on it as often.
The recipe is from another blogspot blogger at Mommy Makes it Better: Crock Pot Applesauce


Like any good cook, I adapted the recipe a little. Essentially, I peeled and cut up enough apples to fill my crock pot; and I added some frozen peaches and strawberries. Then I added about a teaspoon of lemon juice, five teaspoons of brown sugar, and sprinkled cinnamon over the top.


Place the crock pot on "low" and let it simmer about 6-8 hours, stirring occasionally.
Once it looks like applesauce, mash the larger chunks or use a blender if you like less chunky.

I found that adding the strawberries made it a little more tart, but you can always add sugar and/or cinnamon to taste after the applesauce is done.


This made about one and a half quarts; which I've got in my refrigerator ready to take to work every day!

Think you'll try this recipe? Let me know!
Have another favorite apple recipe? Feel free to share; I'd love to try it!


Thursday, September 18, 2014

The Best Snickerdoodle Cookies

I never thought I liked snickerdoodle cookies; or at least they were never something I thought to buy or make, until this year...


I take a vacation with a wonderful, diverse group of friends twice a year. This last winter vacation, I
decided to make several dozen cookies (and a few loaves of bread) for the group to snack on over the weekend get-together. I never could have guessed how much snickerdoodles would be missed; or how much I would be [lovingly] harassed for not making such a common favorite cookie - I had no idea they were a "staple" cookie!
I wasn't going to make the same mistake for our summer vacation when I was asked to "kindly grace [them] with [my] talents in cookie and treat baking."
If I was going to make snickerdoodles, I needed to find a recipe that sounded good to me. My prior thoughts on snickerdoodles were that they were a thin, crispy cookie, lacking in much flavor other than cinnamon - I like most cookies to be soft, chewy, and chunky with flavors.

I think I typed in something like "best snickerdoodle recipe" on Pinterest and quickly discovered pudding cookies - oh my! The blog post I found claims "7 of the best pudding cookies". This recipe changed my lack of interest for snickerdoodles into love and gave me a new "staple" cookie for holiday baking. I even raved about the recipe on Facebook:


It had me at "white chocolate" and kept me hooked. I could type out the recipe here, but why mess with an already perfect place to get it? I couldn't agree more with everything Alyssa (the recipe critic) has to say about the cookies. (And I'll just add that I wish I had all the time to make the recipes she's discovered!)

Since the summer, I've made them again - a double batch - for girls weekend, to share with family, and to share with coworkers. Needless to say, everyone loved them. I have several requests to make them again - and I definitely will!


Friday, August 22, 2014

Wooden Pallet Sign

I may be a little behind with the wooden pallet trend, but I'm still happy to have made my first pallet sign.

I had seen so many beautiful ideas on Pinterest and knew I wanted to make one, but first to get some pallets, and second to put an image and a quote together...


If you think making a pallet sign is going to be easy, think again - taking the slats off took a lot of strength! Now if I had a saw to cut through the nails, it may have been different, but I was hammering at the wood to force the nails back out.
I was able to obtain a smaller than average pallet, the slats measuring about 28.5" by 3.5". I didn't want as much gap between the slats, so I had to take it all apart and put it back together. I might add that I'm all arms and legs, without much muscle, but I like to be able to do things myself. And, for this one, I didn't ask for any help - and only broke one slat!
After it was apart, I attempted to sand the edges and rough spots. Pallet wood seems to be extra rough and untreated, it's like the wood that isn't good for anything else. I by no means got the wood smooth, but it was somewhat nicer than before sanding.
Next, I nailed the pallet back together, closer, using the same nail holes that were already there; and started drawing on the sun and rays. I used a very large plant pot to get a perfect arc and used the straight edge of the broken slat for the rays.
I used a pencil to draw the lines, thinking that the paint would cover it; however, if you are more of a perfectionist than I am, you will want to be very light with the pencil and/or erase it as you go. If I look very closely at my finished art, I can see the pencil lines.
Before beginning to paint, I spackled over the nails to help hide them and let it dry overnight. I couldn't wait to get up and start painting the next day!

I did two coats of paint on everything, which took a couple days with having to go to my real job and all, but I wanted vibrant color!

Figuring out how to the the letters on took some thinking - I don't trust my freehand and I wanted some different fonts. I had seen a lot blogs on transferring ink to wood by printing the lettering backwards, then wetting it to force the ink back out onto the wood. That was all on unpainted wood and mine had to go over the paint, so I didn't think that would work. I resorted to cutting out and tracing the letters.
A steady hand and patience gets the letter painting done; I definitely had to take breaks because I kept going cross-eyed with the closeup work. Again, I did two coats of paint.
Now I could have been done; the sign was beautiful, bright, and cheery - just what I need for first thing in the morning. I love the 'weathered' look though, so I got the sandpaper out again and roughed up the painted edges and scratched out some of the letters.
Finally, I need to add something to be able to hang it on the wall. I found these hooks and Michael's and thought they would work well - this pallet sign is pretty heavy!
I thought I'd need to get my dad's help to hang it, but he's pretty busy getting ready for the school year to start. I went over to see what I'd need and he gave me some dry wall anchors. I drilled some holes and got it hung all by myself!

I'm so excited to have this hanging in my craft room - "be awesome" - not just about personality, I think it fits for crafting too. I'll have it on the wall right next to my work clothes closet, so every morning when I 'zombie-walk' into the room to get dressed, I'll see the bright colors and have a nice reminder to start my day.

Another thing that I love about this is that it could be a great hand-me-down for my nephew someday!



Tuesday, August 12, 2014

Black & White Photo Mat


(at least I do [most of] the things I pin)


I had this in mind to make probably as soon as my nephew was born. I loved the idea on pinterest and thought it would be absolutely perfect to make up the mat of pictures from his first year and the main picture from his first birthday.
I made the collage of black and white photos around the colored 5x7 photo using a photo editing program called GIMP (which you can download for free here) It is supposedly similar to Photoshop and definitely takes some learning and getting used to.
I wanted to be able to print it all out as an 11x14 picture, rather than trying to cut out and glue pictures onto a mat. (By the way, my sister made the invitation; she's also quite crafty - she makes beautiful scrap books.)
I also made an 8x10 version with different cake smash photos for 'Mama and Dada' and for 'Grandpa'. The pictures on the mat are all in a line rather than overlapping as they do in 11x14.

The photo collage is a great way to display favorite photos without framing them all.
It's definitely a project worth playing with and a wonderful gift!


Tuesday, July 8, 2014

Teacups and Wedding Shower

This past Sunday was my future sister-in-law's wedding shower. I may have mentioned before that I am the second of five kids - three girls, then two boys. The sister younger than me was married 4 years ago, and she hosted this shower for our youngest brother's fiancé.
She planned an outside 'tea party' at her home - we could not have asked for more perfect weather!
My sister is an excellent planner, organizer, list-maker, etc. I do not have as much patience for that, but I wanted to help where I could. I volunteered to make the cake (which turned in to cupcakes) and to make some gift prizes for the games - candles or succulents in teacups - ideas that we had discovered on Pinterest. (Pinterest is such an amazing thing to have now for any kind of event planning. Just type in one word of what your theme is and you'll find thousands of ideas that other people have already used for a similar event - easy planning!)
First, I had to find some teacups! Thrift stores are wonderful for these kinds of purchases (although, I like a good thrift store find whatever it is). I found all of the pretty teacups for around 25¢ each.
The candles I started making a while before the shower, but the I waited for a couple days before the shower to make plant the succulents. While they are super pretty, I wasn't sure how well they would last in a teacup; and I didn't want to try to keep them alive for too long.
I bought a variety of small plants and most of them were the perfect size for one to a teacup; and the guests loved them too!
  
The candles were easy to make because I never throw away that extra wax that doesn't burn off from my candles. I already had some string and wood wicks and lots of wax to melt down. I also keep a few of the large glass jars for melting the wax in.
Do you have a candle warmer already? If not, I highly recommend one! They make melting wax so much simpler than other methods. I just break up the wax into a glass jar, put it on the warmer and wait.
Rather than pouring the melted wax in all at once to fill the jar, pour in a little at a time, allowing it to cool before adding more; otherwise, the center of the wax will sink in and you won't have a nice smooth surface.
I was very happy with how they turned out; they looked even better than I had expected! Can you tell that I tried to make candle colors to look like tea/coffee?
And of course, the teacups went perfectly with all the other decorations; thanks to Pinterest.

Congratulations to my baby brother and his bride to be!


Friday, April 4, 2014

Ribbon Egg Towels

I think this is the fastest I've ever gone from pinning a project on Pinterest to finishing my own copy of it...

I found this beautiful ribbon egg towel DIY tutorial, from Addicted 2 DIY by Katie, just two days ago and knew I had to make my own!

Katie has a great tutorial over at her blog; so I recommend you check it out here, if you want to make one with step-by-step directions

I already had some pretty velvet ribbon that I had just purchased from an Etsy shop and I thought it would be perfect; so I just had to go buy some towels. (I got the plain white one from Target for $3 and the other one from Walmart for $2.99.)
And since I don't have a cricut or printer, I used an Easter egg cookie cutter for the shape/size.

~Please note that if you use velvet ribbon, it can be ruined from an iron. Since that's what I was using, I had to lay the ribbon upside down, then the Heat-n-Bond, then the towel, and iron from the backside.

These towels are technically done, but I wanted to add a quick stitch around the edge of the whole egg, just to keep it all on a little better.

This is such a cute, easy, and inexpensive way to decorate for Easter! Or a great gift for someone! I'm already planning on using the same idea to make some Christmas Tree towels (but I don't want to think about winter right now...).


Thursday, November 28, 2013

Thanksgiving Treats

Happy Thanksgiving!

Above are some adorable turkey sugar cookies that I made for a Thanksgiving treat using an egg-shaped cookie cutter and a glass. The different flavored candy corn make perfect "feathers," but last year I used Reese's Pieces and thought they were just as fun.
Making sugar cookies during the holidays is one of my favorite things; and I wanted to share some of my other favorite  holiday recipes with you for this season. (Note: the following three recipes can be found at wegmans.com, but here they are slightly altered in the way that I make them.)

Cider-Glazed Carrots

Oh yumminess! This is an easy fall favorite - and doesn't that roasting turkey just make your mouth water? If you like apple cider and carrots, you'll love this recipe!

Ingredients
   2 lbs Baby Carrots
   2 Tbsp Wegmans Basting Oil
   2 cups Apple Cider
   1 Tbsp Clover Honey
   1 Tbsp Wegmans Lemon-Dill
          Finishing Butter
   Salt and pepper to taste
Yields 4 cups.
Preheat oven to 450°F.
Cut baby carrots in half on a bias. Toss with basting oil in large bowl and season with salt and pepper. Place (in a single layer) on baking sheet and roast for 20 minutes, or longer until desired tenderness.
Glaze
While the carrots are roasting, add cider and honey to large skillet on MEDIUM-HIGH, stirring to blend. Bring to a boil. Cook, stirring about 10 minutes, until liquid is a syrupy consistency and mixture has reduced by about half. Remove from heat. Stir in lemon-dill butter until melted.
Mix with carrots until evenly coated.


Roasted Brussels Sprouts with Bacon

Everything is better with bacon, right? As delicious as the potatoes on the left look, that's not what I'm talking about; you can find that recipe here. I also think fresh shredded parm sprinkled on top of veggies makes a world of difference in taste.
Ingredients
   6 slices Applewood Smoked Bacon, cut in 1-inch pieces 
   2 lbs Brussels sprouts, trimmed and quartered 
   3 Tbsp Wegmans Basting Oil Salt and pepper to taste
Yields 8 servings.

Preheat oven to 350°F.
Toss Brussels sprouts with basting oil and season with salt and pepper. Place (in a single layer) on baking sheet and roast for about 30 minutes.
While Brussels sprouts are roasting, cook bacon.
Add bacon to the Brussels sprouts and roast another 10 minutes.
Sprinkle with shredded Parmesan cheese, as desired.


Yam Gratin with Gruyere

I don't have my own picture for this recipe, but here is Wegmans': 
I recommend using at least 1 cup of cheese for this recipe, but I have definitely used more than that before and even mixed cheeses. Gruyere with fresh Parm. is perfect if you're like me and don't like too much "swiss" flavor.

Ingredients
   3 lbs yams, peeled
   2 cups (16 fl oz) Heavy Cream
   1 cup Shredded Gruyere

   1 tsp salt
Yields 6 cups.
Preheat oven to 350°F.
Stir together heavy cream and salt in large bowl. Using a mandoline, slice yams into large bowl, coating slices with cream mixture.
Spray 9x9 baking dish with nonstick spray and place on a cookie sheet to catch overflow during baking.
Layer yams and cheese in baking dish. Pour any remaining yam-cream mixture over top.
Bake, uncovered, on center rack of oven for approximately 1 hour and 45 minutes or until desired tenderness. About every 30 minutes press spatula against top layer to allow liquid to flow over "crust." Remove from oven and let rest for 15 minutes.


That's all for today! I want to get over to my dad's and see what he's got cooking. If you want to see some of my other favorite 'side' dishes, check out my pinterest board 'veggipes.'

Hope you all have a wonderful Thanksgiving this year!

Sunday, September 22, 2013

Jump into Crafting


My favorite season is, without a doubt, fall. I love to see the leaves change to their brilliant colors. I love the sound of the crunch beneath my feet. I love warm, breezy days and cool nights.


Here’s my “nephew” jumping off the sidewalk in front of my apartment. He loves to be outside whatever the season!


Fall is a wonderful start to a craft-full season. Autumn decorations, Halloween costumes, Thanksgiving foods, paper snowflakes and other Christmas trimmings are all perfect opportunities for creativity!
This year I decided to make a wreath; did you see it (above) hanging on the door? Here’s a close up:
I absolutely love the way it looks!
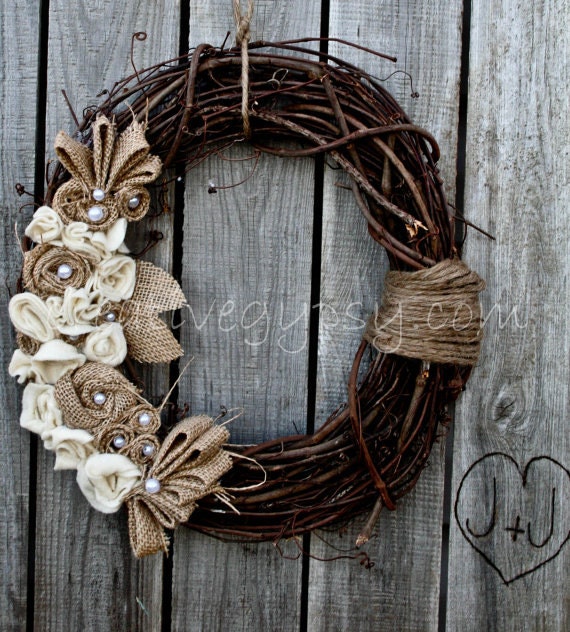
I got the idea while browsing “DIY” on Pinterest; and found one on Etsy for $35. But it didn't cost that much to make mine - $5 for the grape-vine wreath, $8 for the sunflower (I found others a bit cheaper, but liked this one best), $3 for the ivory “bead” string, and around $6 for a roll of 2” wide burlap - I bought all on sale and/or with coupons and have leftovers. I started out attempting to make burlap flowers, but I have a short supply of patience and after just two I didn't want to make any more… 
So, if you like to save time, buying it on Etsy is a nice option:
SALE Rustic Rancher Wreath Pre-Order
(Rustic Rancher Wreath by The Creative Gypsy)