I've gotten a lot of use out of my cake decorating skills this summer! Starting with my own birthday cake, I've also made cupcakes for my nephew's first birthday, my sister-in-law's wedding shower, and my sister's birthday! In the next two months, I'll be making a practice run and the actual wedding cake for my brother's wedding. It's nice to enjoy something like cake decorating.

I started learning cake decorating when I got a job with Wegmans' Bakery in 2008. It is definitely a skill that takes a lot of practice and for a while, I wasn't sure I was going to be able to make roses.
Once I became more familiar with decorating, I really started loving it.

The first cake I made outside of work was for my brother's graduation party in 2009 - the same brother whose wedding cake I'll be making in October. Since then, I've make a lot of cakes for special occasions, or just because. Pictured are some of my favorites.
With all the summer heat, cake icing tends to melt, fast. I had wanted to make a tiered cake for my birthday from an idea I saw on Pinterest (of course); however, not having air conditioning, the icing between the layers was too soft and made the cake slide. I ended up making this cake instead and it was still beautiful.
For the rest of the summer events we had planned, I decided to make some fun and fancy cupcakes.
I don't have a step-by-step pictorial, but I'll share what tips to use and a couple links that I found helpful. If you've never worked with decorating tips or just want more instructions, check out wilton.com. You can also check out my Pinterest board for lots of links.
Interestingly enough, the cupcakes, in order of each event, also go up in level of difficulty.
Nephew's 1st Birthday Sunshine Cake

This sunshine cake was made with a 9" round pan and regular sized cupcakes.
To make the cupcake icing swirl with colors, I divided red, orange, and yellow icing into the decorating bag.
To make the cupcake icing swirl with colors, I divided red, orange, and yellow icing into the decorating bag.
(Icing cupcakes - http://www.wilton.com/technique/1M-Swirl)
I used a small star tip to make the 1 on the cake.
I used a small star tip to make the 1 on the cake.
Tea Party Wedding Shower Flower Cupcakes

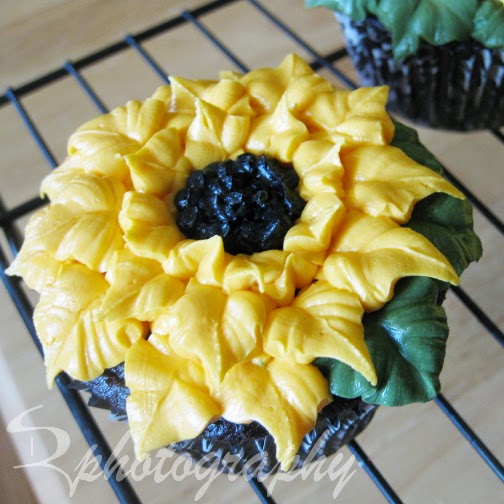
I used my large rose tip #125 for the roses and the poppies, a leaf tip (#366 or cut the bag to look similar) for the sunflowers, and a 2D star tip for the hydrangeas.
Click here for the rose technique - instead of icing on the nail, pipe the rose right onto the cupcake.
I followed Martha Stewart's technique for the poppies; again, just piping right onto the cupcake. (I did not refrigerate them.)
To make sunflowers, use the leaf tip and work your way from the outside; creating smaller circles and petals.
Here is a great pictorial on how to do the hydrangeas. It also has a picture for mixing colors in a bag (like I did for the sunshine cupcakes).

Alice in Wonderland Birthday "Painting the Roses Red" Cupcakes

My sister has always loved "Alice in Wonderland" and the thought of doing a themed party. For her 30th birthday this year she finally planned the theme. She asked if I would be able to make cupcakes with white roses that looked like they have been painted red.
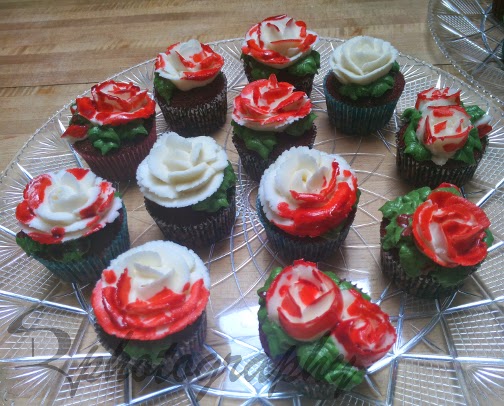 I figured that I could actually paint the red coloring onto a white rose for the effect, but it took a little experimenting. The icing for these roses had to be quite a bit thicker so that the flower stood up better and didn't 'wilt' when I put the paintbrush to it. The bright red coloring had to be watered down a little to help it spread better on the icing. And the combination actually made the roses still look wet - but watch out! it will stain if it gets on anything!
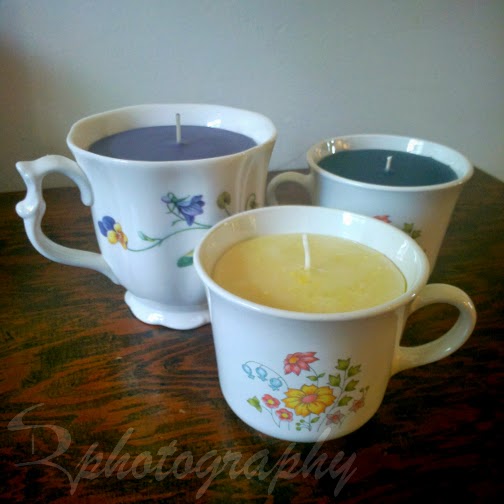
**Side note: remember the teacup candles that I made in July? I made some whimsical teacup candles to go with the Alice in Wonderland theme:
It's definitely been a fun and eventful summer. Now that it's winding down, I'm ready for fall - cooler weather, gorgeous colors, and pumpkin everything!
Don't forget to come back to see the wedding cake in October.
 |
| photo taken, at my request, by my sister; edited by me. |


