Tuesday, December 24, 2013

Pear Gingerbread

If there's one new dessert you want to try this holiday, it should be this one! Oh my is it delicious! (And that's coming from someone who doesn't generally like gingerbread.)


I don't have the prettiest pictures of it, but I do have a pretty simple recipe. I got the recipe from a coworker a few years ago, and just got around to making it last Christmas Eve. It was a hit with everyone!

Pear Gingerbread
Bring the following ingredients to a boil, then pour into the bottom of a 9x13 pan:
     6-7 c.   pears
     1 1/2 c.   water
     1/2 c.   sugar
     1/4 c.   nutmeg
Mix the following together:
     2 1/2 c.   flour
     1/2 c.   sugar
     1 1/2 tsp.   cinnamon
     1 1/2 tsp.   ginger - dry
     1 1/2 tsp.   baking soda
     1/2 tsp.   cloves - ground
Mix the above set with the below set and then pour over the fruit:
     1 c.   molasses
     1 c.   water
     1/2 c.   oil
     1   egg
Bake at 350 for approximately 30 minutes.

Caramel Sauce
Boil the following ingredients together, stirring until caramel brown:
     1/3 c.   sugar
     3 TBSP   butter
     2 TBSP   water
Slowly add about 1 cup cream to hot sugar/butter mixture until desired consistency.
Pour the sauce over the gingerbread and enjoy!

Sunday, December 22, 2013

Baby Blanket


Oh! I'm very excited to finally be able to share this one! 


I made a baby blanket for a friend last month and I finally gave it to her. I've been waiting to post it, just in case; I didn't want her to see it ahead of time. She's due in January with her first - a baby boy - and she picked out a little deer nursery theme with these colors.
After opening the blanket, she was in awe that the colors were a perfect match. But of course they were - I looked up the crib set and matched it purposely. :)


This is the first "quilt" I have ever attempted. It wasn't anything too crazy - I cut blocks of the different colors to get the stripes around the sides and did all brown for the back. This one is about a 30 inch square.

And to go with it, I also made a little blanket about 16 sq. in.
I love the colors in this one! (So far, these two prints are the only ones I've seen with deer on it.)
My friend also loved the fox on it because she said that they got the baby a little snuggle-buddy (the stuffed animal with a blanket attached) that is a fox!

I think that these blankets turned out perfectly for her new nursery. I can't wait to see pictures when she finally has it all set up!
And, of course, I can't wait to meet the little guy :)

Saturday, December 14, 2013

Candy Christmas Tree

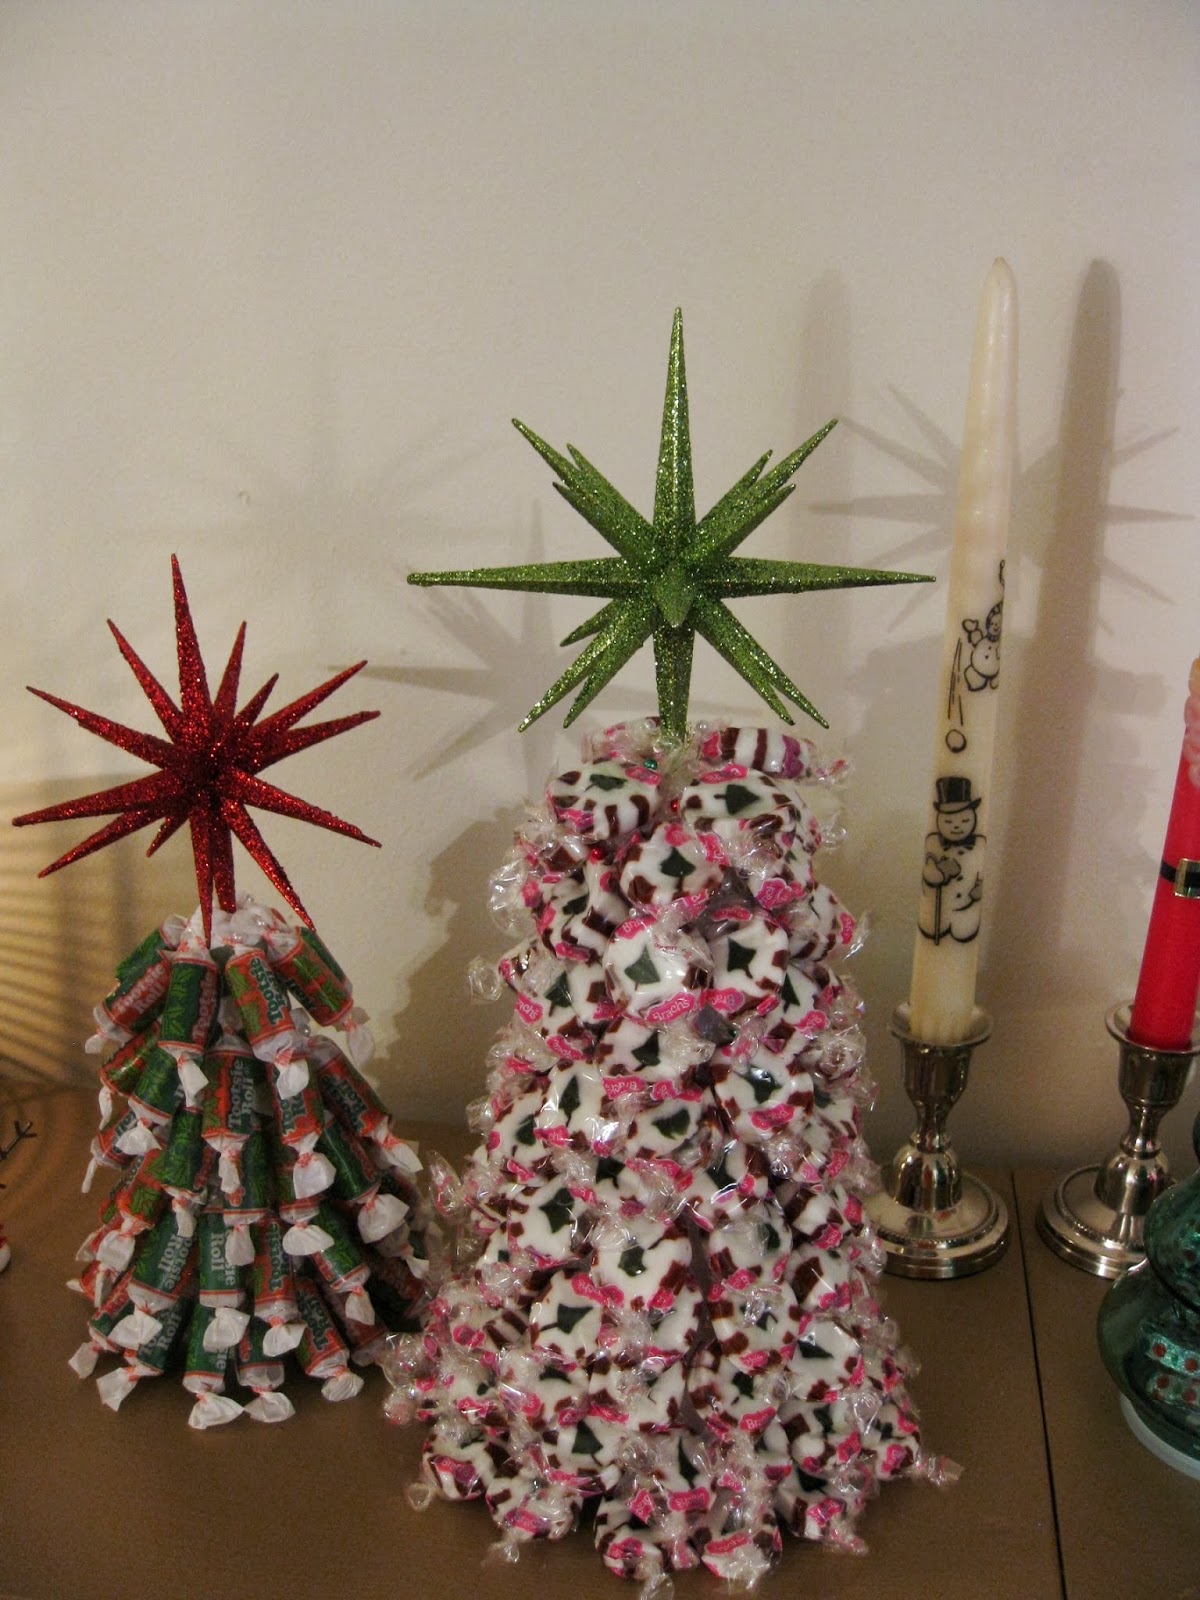
So, I told you all about the candy wreaths I like to make, but this year I decided to try something even easier - candy Christmas trees. Buy the styrofoam cones from your craft store and use sewing/floral pins to secure candy pieces. I thought it would be super easy, fun, and cute! I found the awesome star ornaments to use as a tree topper at Target.

A "sweet" holiday decoration!

Thursday, December 12, 2013

Christmas Tree Pillows

I got the idea for this craft when I saw a similar pillow in a Ten Thousand Villages store. I decided to make one for my sister (who had asked for pillows for Christmas to go with her new couch) and one for myself.
Here's a little picture tutorial on how to make your own Christmas Tree Pillow!

  First, pick out some fabric. I chose to use different green holiday fabrics for the trees with a plain red background, but pick out your favorite tree fabrics even if they are  "painted pink" the way Lucy van Pelt prefers. I also bought a black with white snowflake print that I thought would make a neat background.
Then start cutting out triangles. Try different sizes to create a visual depth for a forest, or try skinny and fat ones; it all depends on what size your pillow is. In the picture to the right, the blue squares are 1in.; I wanted my trees tall and skinny to fit on my long pillows.
Once you have enough trees for your pillow, cut out and apply Heat'n'Bond to the backs on the fabric to create an easy application of the trees to the background. Arrange the trees on the background and start ironing on the bottom layer first. I laid the trees out before peeling off the paper backs, then ironed each tree individually. However, you could try peeling off all the papers and ironing it all at one time. Also, I would recommend you take a picture of your layout before you start ironing, just in case you need to go back to it for a reference. (Maybe you get distracted from ironing with my blog and your kids or pets go over and move things around on you... or maybe I'm just a little o.c.d.)
After all the trees are ironed on, I reinforced them by sewing along the edges. I thought that this would keep the trees on better through multiple washings, while the edges could fray a little and add some nice texture.
    

Now the front of the pillow is ready!
Add whatever style back you like and you're all set.

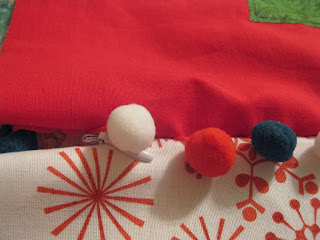
  For the smaller pillow (the one pictured at the top), I put a zipper up the side and found some fun pom-pom trim to go around the pillow case. And I had a Christmas present for my sister -


For my pillow, I used white ribbon all the way around and, rather than try my luck with another zipper, I left the middle of the back open to fit the pillow into.


So now do you feel ready to make your own? If you do make one, share a picture with me; I'd love to see it!
I have a bit of extra fabric that I'm thinking about sewing into a Christmas quilt... maybe for next year.


Tuesday, December 10, 2013

Winter Wreath

Every December, I like to cut down a real evergreen tree for Christmas. It's a family tradition from my childhood; although, I remember there being a lot more snow than we have lately.

This year, I wanted to try my skill at making a wreath from the boughs cut off the bottom of the tree. I had a pretty full bag of cinnamon pine cones (that I bought last year and have since lost their scent) that I knew I wanted to incorporate; as well as some burlap ribbon. I found the flat wreath base that I wanted at Michael's - I was surprised my JoAnn's doesn't carry this item, only fat foam ones. I wanted the flat wooden one so that I could glue the pine cones on, rather than try to use floral wire or pins. I did use floral wire to hold the boughs on.
It didn't turn out quite as I had pictured, but it's pretty close. I just switched out my fall wreath and I'm ready for the holidays; or at least my front door is.


Sunday, December 1, 2013

Candy Wreaths


I remember making these candy wreaths as a kid. 

I think my Mom found the idea and instructions in a magazine and just loved it. I love it too! Several years went by with this craft forgotten, until a few years ago when I saw the instructions in magazine (familiar story...).

And I have made a few every year since!


These candy wreaths make a wonderful holiday gift. I made the one at the very top and center for my boyfriend's family a couple years ago and took it as a gift at Thanksgiving. In fact, his mom liked it so much, she told the grandkids they weren't allowed to eat it. Three years later, it's still hanging up un-touched!

Actually, they're great gifts outside the holidays too. I made this one for my sister when she started teaching in a new classroom. The students and other teachers loved it!

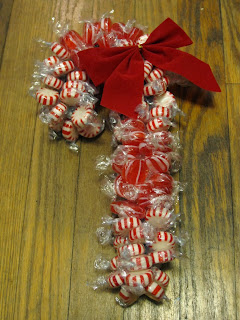
For the base of the wreath, you can buy metal rings at JoAnn stores for under a couple dollars, depending on the size, but even a small one uses a lot of candy. Or you can dig through your parents' closets for some old wire hangers; which is what I was doing until I couldn't find anymore. If you use the hangers, you have to take them apart and create your own circle. The whole hanger will make a pretty large wreath, but not quite large enough to make two smaller ones. I definitely think the metal rings are easier and sturdier; and they aren't that expensive. Although, using the wire hangers I was able to make some awesome candy canes.


Once you've got your base, you'll need lots of candy. I have often bought what I thought would be enough, only to have to go back out for more. I always buy the wrapped candy that twists open on both ends. Then I use floral wire to wrap around one end of a piece of candy and onto the ring (or hanger).

There are several different tutorials on how to make these. I just did a Google search for "candy wreath tutorial" and found three different ways to tie on the candy. Mine is a little different still, but I may be trying out the other ways to see what's easiest.
I have always used floral wire without cutting it til the end. I start by wrapping the floral wire around the ring several times, overlapping itself so that it doesn't just pull off. Then I wrap the wire around one end of the candy wrapper three times; it tends to unwrap itself a little as you go.
I continue wrapping the wire around candy about an inch apart until I have about a foot of wire and candy; any more than that and it usually starts to tangle or is just harder to manage. Take that section and wrap it around the ring, pushing it together to make a nice full wreath.
Keep adding candy and wrapping until it's nice and full. Then wrap the floral wire back over some of the candy to secure it again.
I usually make my own bows with ribbon, but in the picture to the right I used a pre-made bow with a gift tag and added some tiny ornaments around the wreath.

And if you don't have anywhere to hang a wreath, they also make a great candle wreath!


If these aren't already a part of your gifting traditions, now is the perfect time to start.
Happy crafting and I hope you all have a wonderful holiday season!


Thursday, November 28, 2013

Thanksgiving Treats

Happy Thanksgiving!

Above are some adorable turkey sugar cookies that I made for a Thanksgiving treat using an egg-shaped cookie cutter and a glass. The different flavored candy corn make perfect "feathers," but last year I used Reese's Pieces and thought they were just as fun.
Making sugar cookies during the holidays is one of my favorite things; and I wanted to share some of my other favorite  holiday recipes with you for this season. (Note: the following three recipes can be found at wegmans.com, but here they are slightly altered in the way that I make them.)

Cider-Glazed Carrots

Oh yumminess! This is an easy fall favorite - and doesn't that roasting turkey just make your mouth water? If you like apple cider and carrots, you'll love this recipe!

Ingredients
   2 lbs Baby Carrots
   2 Tbsp Wegmans Basting Oil
   2 cups Apple Cider
   1 Tbsp Clover Honey
   1 Tbsp Wegmans Lemon-Dill
          Finishing Butter
   Salt and pepper to taste
Yields 4 cups.
Preheat oven to 450°F.
Cut baby carrots in half on a bias. Toss with basting oil in large bowl and season with salt and pepper. Place (in a single layer) on baking sheet and roast for 20 minutes, or longer until desired tenderness.
Glaze
While the carrots are roasting, add cider and honey to large skillet on MEDIUM-HIGH, stirring to blend. Bring to a boil. Cook, stirring about 10 minutes, until liquid is a syrupy consistency and mixture has reduced by about half. Remove from heat. Stir in lemon-dill butter until melted.
Mix with carrots until evenly coated.


Roasted Brussels Sprouts with Bacon

Everything is better with bacon, right? As delicious as the potatoes on the left look, that's not what I'm talking about; you can find that recipe here. I also think fresh shredded parm sprinkled on top of veggies makes a world of difference in taste.
Ingredients
   6 slices Applewood Smoked Bacon, cut in 1-inch pieces 
   2 lbs Brussels sprouts, trimmed and quartered 
   3 Tbsp Wegmans Basting Oil Salt and pepper to taste
Yields 8 servings.

Preheat oven to 350°F.
Toss Brussels sprouts with basting oil and season with salt and pepper. Place (in a single layer) on baking sheet and roast for about 30 minutes.
While Brussels sprouts are roasting, cook bacon.
Add bacon to the Brussels sprouts and roast another 10 minutes.
Sprinkle with shredded Parmesan cheese, as desired.


Yam Gratin with Gruyere

I don't have my own picture for this recipe, but here is Wegmans': 
I recommend using at least 1 cup of cheese for this recipe, but I have definitely used more than that before and even mixed cheeses. Gruyere with fresh Parm. is perfect if you're like me and don't like too much "swiss" flavor.

Ingredients
   3 lbs yams, peeled
   2 cups (16 fl oz) Heavy Cream
   1 cup Shredded Gruyere

   1 tsp salt
Yields 6 cups.
Preheat oven to 350°F.
Stir together heavy cream and salt in large bowl. Using a mandoline, slice yams into large bowl, coating slices with cream mixture.
Spray 9x9 baking dish with nonstick spray and place on a cookie sheet to catch overflow during baking.
Layer yams and cheese in baking dish. Pour any remaining yam-cream mixture over top.
Bake, uncovered, on center rack of oven for approximately 1 hour and 45 minutes or until desired tenderness. About every 30 minutes press spatula against top layer to allow liquid to flow over "crust." Remove from oven and let rest for 15 minutes.


That's all for today! I want to get over to my dad's and see what he's got cooking. If you want to see some of my other favorite 'side' dishes, check out my pinterest board 'veggipes.'

Hope you all have a wonderful Thanksgiving this year!

Tuesday, October 29, 2013

October Cookie Party

In the last few years, I have been trying to have cookie parties throughout the holidays. I think that baking and decorating cookies with friends and family is a great way to get together, plus everyone else can take home cookies and I'm not left with too many when I just want a few!
I have fond childhood memories of making Christmas sugar cookie cutouts with my Mom and siblings; and family friends occasionally. My Mom loved to make cookies and deliver plates to our neighbors and friends. I remember making so many at a time that we would freeze them to make them last longer!
A few years ago, I spent a year working in a Wegmans Bakery learning (among other things) a professional way to decorate cutout cookies. Since I had so much fun as a kid with sugar cookies, this part of the job never seemed like work. I quickly realized there are so many more occasions that one can make cutouts for and started buying cookie cutters after the season, when they were marked down - hearts for Valentine's Day; eggs for Easter; a pumpkin or apple and a leaf for fall; and did you know you could use an egg shape to make turkeys?

After my younger sister moved back to the area last year, I decided to have a girls' night cookie party with my sisters and some friends. It was just after Halloween, so we did all the fall cutouts I had, some chocolate chip cookies, and a first attempt at coconut macaroons - yum! Later that night, I found out that I was going to be an Auntie!
   Now my precious nephew is four months old. And this past Sunday I invited my family over to have another cookie party. Since we're still in October, my sister brought her ribbon cookie cutter so we could decorate pink ribbons in honor of breast cancer research.
jack-o-lanterns and spiderwebs for Halloween
We were more ambitious than we had time for...
We made sugar cookies, oatmeal cranberry white chocolate chip cookies, and the dough for chocolate chip cookies. If you've never made the oatmeal cookies, you have to try them!
(Click the picture for the Ocean Spray recipe.)


There were no big announcements at the end of this night; and, after we got the kitchen cleaned up, I took out my Grandma's old cookie jar and filled it with the oatmeal cookies. 
Each 'house' got to take home cookies in little paper Halloween bags; and I put my sugar cookies on little Halloween plates.

I can't wait to share more cookie pictures and recipes with you for Thanksgiving and Christmas!

Saturday, October 26, 2013

Repurposed DVD Rack

   I wanted more color in my bathroom, but I'm renting and not supposed to paint the walls...

My last apartment's bathroom didn't have a closet in it. There were a few shelves behind the toilet and a couple towel bars; by default, all of my bathroom items were kept out "on display." I liked having a basket filled with rolled up towels, as if it were ready to be taken to the beach. Speaking of the beach, I like that theme for a bathroom.
This apartment has a good sized closet, in which I impulsively unpacked all my bathroom items upon moving in. Now, a year later, I had an idea that seemed better.
I had a DVD rack sitting in my basement that had been put out of use when I bought a new TV stand with plenty of space for DVDs. This was the perfect width for between the tub and toilet (pretty much the only 'extra' space in the bathroom); and, since the shelves are have bars that run across, the bottom two work together as a magazine rack!
I'm happy with how it's all put together - towels are back out on display to add some color and I was able to decorate with some beach shells. 
And bonus! There was extra space in the bathroom closet, so I moved things around to make more space in my craft room. I think I'll have that re-filled soon enough!

Thursday, October 24, 2013

Purse

I found these great fabric prints months ago and knew I wanted to make a purse with them - I finally finished it today!


I have made a couple handbags in the past, but this time I was hoping to create a purse quite similar to Vera Bradley's Little Betsy. Little Betsy is what I consider to be the perfect purse; and, according to it's reviews, so do many others -
"Just the right size and can fit everything in it that I need."
"First of all, it holds WAY more stuff than I thought it would! Second, the pockets are FABULOUS for keeping organized!"
"This bag is a reason why I fell in love with Vera Bradley. It holds a ton of stuff, effortlessly and keeps everything organized."

I'm sure I don't need to promote Vera Bradley (unless you're looking for a really good reason to justify spending the money). However, it's unfortunate that they are slowly doing away with this bag, when I've only got one... So I had to try making my own!
I took some rough measurements, cut out the sides and bottom, and started by adding quilt batting to make the cotton fabric sturdier. Then I sewed on the many pockets - I love pockets! Purses without pockets seem to eat anything I put in it and then I spend more time trying to find my wallet than I spent shopping.

It did take me a while to decide the pattern placement, but I finally settled on the polka dots on the inside and flowers with the red for trim on the outside.
Since I wasn't using an actual pattern (I rarely do), I tried to do a lot of visualizing and pinning before actually sewing. And even with that, I did a lot of adjusting and replacing as I went. It was a slow process.
As I started placing the sides and bottom together, I realized that I hadn't adjusted all the measurements correctly and had to add some 'peek-a-boo's' to the bottom sides. Still, I think it adds nicely to the purse.
                  Also at this point, I ended up trimming in the sides at an angle. You'll notice I had just rectangles for the sides in a picture above, but that didn't make for a visually appealing purse. So, I made the sides more trapezoid shaped, with the tops a few inches smaller than the bottoms.
Now all I had left were the handle straps and top trim.
The straps weren't too difficult to sew, but getting the right placement on the edging was.
I had the whole purse sewed and "done" at one point, but thought the straps were placed oddly. So I took the top all off again and tried again; although, I was irritated enough at having to redo the work that I set it aside and waited a few weeks to take it apart and put it back.
I finally got up this morning and decided it was time to finish the project! It didn't seem to take me very long at all. It's funny how I can get caught up and frustrated working on something, so I'll put it aside for a while; then when I come back it seems so much easier.
I'm very pleased with how it turned out. 'Slow and steady' will pay off!


I've already filled all the pockets and as another reviewer said,

"It is perfect for everyday. With 6 inside pockets and 1 outside, you'll never have trouble finding your keys or your cell phone and still have room left over for more."


You'll see me with this one over my shoulder very soon!