Showing posts with label candy. Show all posts

Wednesday, October 7, 2015

Pumpkin Candy Dish

 Here's a super easy - seriously, less than ten minutes - craft and seasonal decoration!

I found this awesome pumpkin-shaped jar at Michael's. It was in the candle making section, but as soon as I saw it, I knew exactly what I would do with it... 
I walked over to the floral section and found green coil wire, spotted a bag of candy corn near the checkouts, and got in line.

Once I was home, I washed the jar, then wrapped the wire around the top a couple times, leaving several inches on each end. I used a pencil to wrap the ends of the wire around and create spirals - now I had a pumpkin jar to fill with candy! 

I know some of you are judging me right now because, "candy corn is gross." I'll admit though, I enjoy a little sometimes; even if you don't eat candy corn, it's still a cute dish for autumn!
Perhaps, you'd like to fill it with acorns, colored rice or [un-popped] popcorn, or Reese's pieces - any of those are great for fall decorating! If you feel like being more crafty, paint the outside of the jar; then hide whatever you like inside. 

I love how mine looks and would love to see yours, if you make one! 


Tuesday, December 16, 2014

Candy & Ribbon Wreath


I love making these candy wreaths! They make quick, adorable gifts that also show you put a little thought and care into it. 

For the past few years, I've made one for my Dad to take to his school (he's a principal and teacher). I thought it would make a fun addition to his office during the holidays - other teachers could stop by and have a little treat and the students might feel a little more at ease in the principal's office with a piece of candy! 

Last year, I shared several photos of the candy wreaths I've made; without a pictorial. This year, I made the wreath an easier way and want to share it again - with step-by-step pictures.


To make this fun candy & ribbon wreath you'll need:

8"-9" round base
(you can buy it or make it with a wire hanger)


3-4 pounds of twist-wrapped candy

curling ribbon


To get started, cut several pieces of ribbon at 12-14 inches each.
Step 1 - tie the ribbon to one side of the candy piece
Step 2 - double-knot the ribbon and candy to the wreath's base
Step 3 - curl the ends of the ribbon using scissors
Step 4 - push the candy pieces together
Continue these steps, until you have a nice full wreath.


In my post last year (see it here for other wreath ideas), I said that I used floral wire to wrap the candy around the base, but that I had found a few other tutorials that I wanted to try. This is one of them and it's definitely faster and easier! The floral wire, after a while, would dig into my fingers and make them sore so that I couldn't make a whole wreath in one sitting. This method, using ribbon, took under three hours and no pain. It also uses less candy (making it lighter) because the ribbon curls make it look full faster.

To finish, I added a colorful bow and it's ready for gifting!


With all the fun ribbon curls, I'm thinking this could also make an excellent year-round wreath - summer parties with bright orange and yellow ribbons; birthday presents with his/her favorite colors and candies; or maybe a Halloween wreath with orange and black.

Whatever the occasion, a candy & ribbon wreath will brighten anyone's day.


Saturday, December 14, 2013

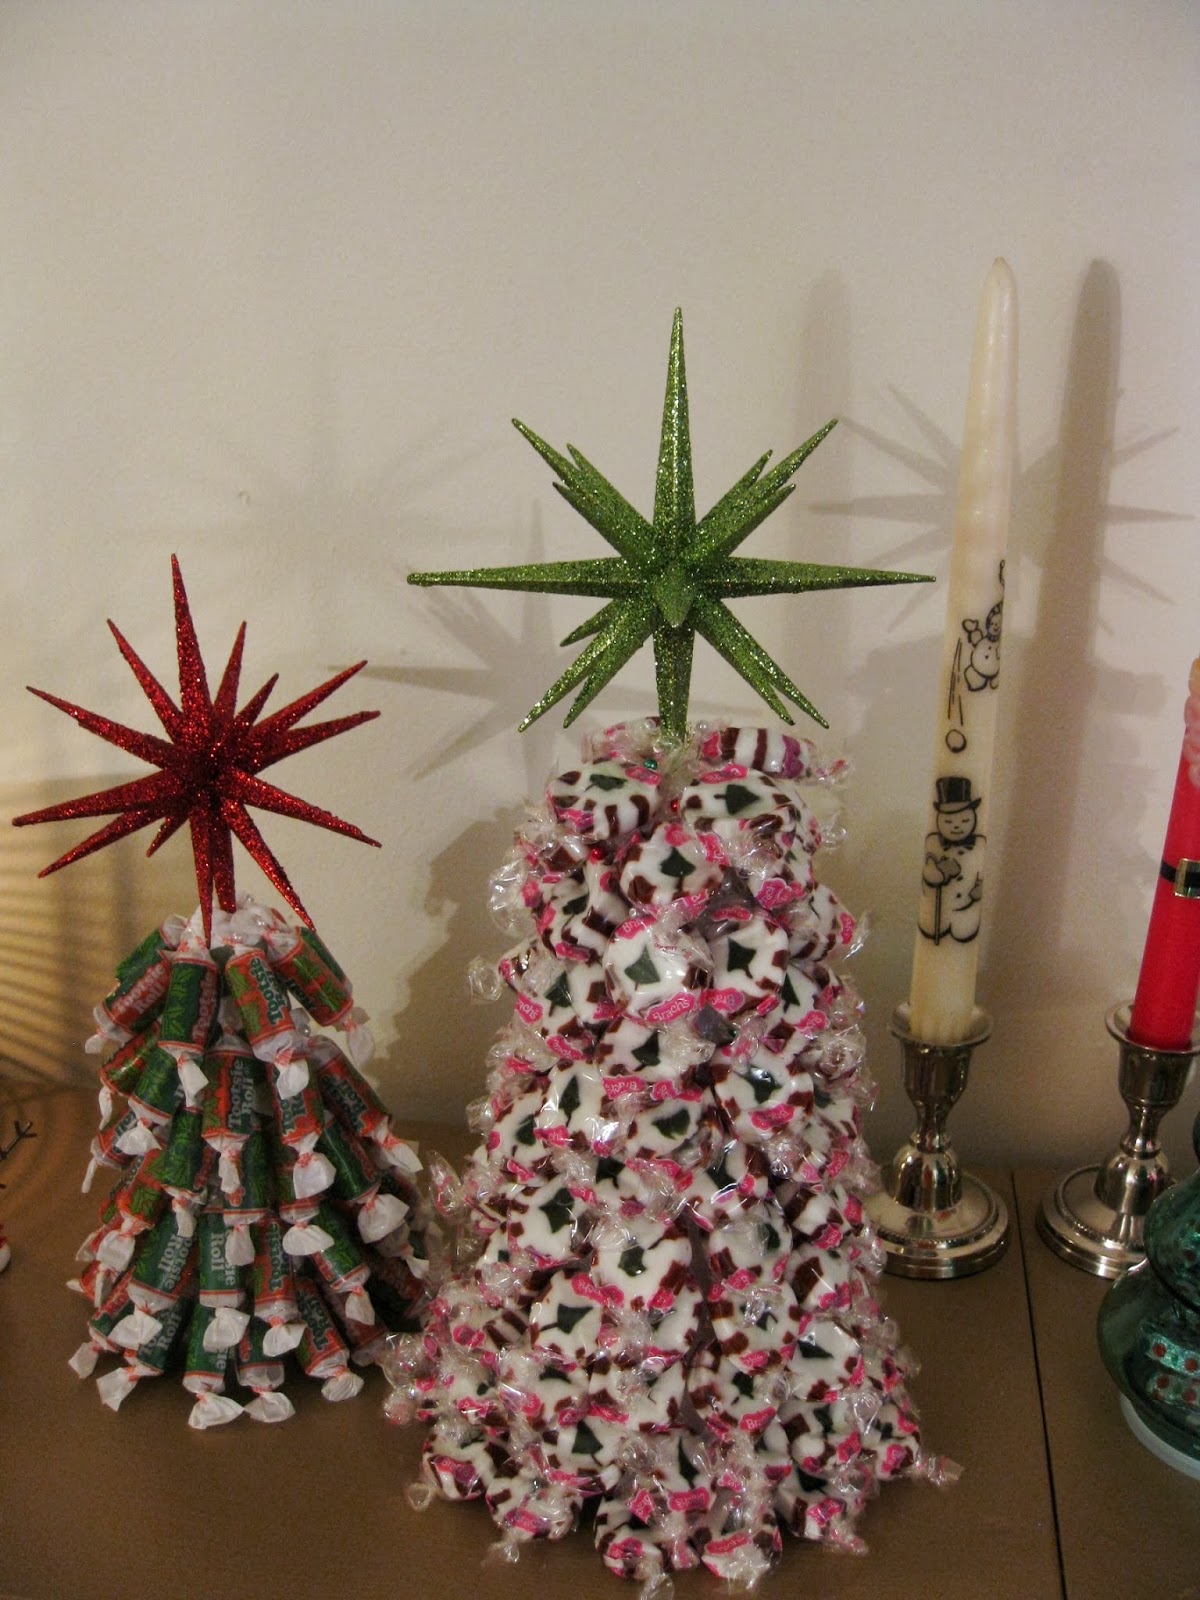
Candy Christmas Tree

So, I told you all about the candy wreaths I like to make, but this year I decided to try something even easier - candy Christmas trees. Buy the styrofoam cones from your craft store and use sewing/floral pins to secure candy pieces. I thought it would be super easy, fun, and cute! I found the awesome star ornaments to use as a tree topper at Target.

A "sweet" holiday decoration!

Sunday, December 1, 2013

Candy Wreaths


I remember making these candy wreaths as a kid. 

I think my Mom found the idea and instructions in a magazine and just loved it. I love it too! Several years went by with this craft forgotten, until a few years ago when I saw the instructions in magazine (familiar story...).

And I have made a few every year since!


These candy wreaths make a wonderful holiday gift. I made the one at the very top and center for my boyfriend's family a couple years ago and took it as a gift at Thanksgiving. In fact, his mom liked it so much, she told the grandkids they weren't allowed to eat it. Three years later, it's still hanging up un-touched!

Actually, they're great gifts outside the holidays too. I made this one for my sister when she started teaching in a new classroom. The students and other teachers loved it!

For the base of the wreath, you can buy metal rings at JoAnn stores for under a couple dollars, depending on the size, but even a small one uses a lot of candy. Or you can dig through your parents' closets for some old wire hangers; which is what I was doing until I couldn't find anymore. If you use the hangers, you have to take them apart and create your own circle. The whole hanger will make a pretty large wreath, but not quite large enough to make two smaller ones. I definitely think the metal rings are easier and sturdier; and they aren't that expensive. Although, using the wire hangers I was able to make some awesome candy canes.


Once you've got your base, you'll need lots of candy. I have often bought what I thought would be enough, only to have to go back out for more. I always buy the wrapped candy that twists open on both ends. Then I use floral wire to wrap around one end of a piece of candy and onto the ring (or hanger).

There are several different tutorials on how to make these. I just did a Google search for "candy wreath tutorial" and found three different ways to tie on the candy. Mine is a little different still, but I may be trying out the other ways to see what's easiest.
I have always used floral wire without cutting it til the end. I start by wrapping the floral wire around the ring several times, overlapping itself so that it doesn't just pull off. Then I wrap the wire around one end of the candy wrapper three times; it tends to unwrap itself a little as you go.
I continue wrapping the wire around candy about an inch apart until I have about a foot of wire and candy; any more than that and it usually starts to tangle or is just harder to manage. Take that section and wrap it around the ring, pushing it together to make a nice full wreath.
Keep adding candy and wrapping until it's nice and full. Then wrap the floral wire back over some of the candy to secure it again.
I usually make my own bows with ribbon, but in the picture to the right I used a pre-made bow with a gift tag and added some tiny ornaments around the wreath.

And if you don't have anywhere to hang a wreath, they also make a great candle wreath!


If these aren't already a part of your gifting traditions, now is the perfect time to start.
Happy crafting and I hope you all have a wonderful holiday season!