Showing posts with label autumn. Show all posts

Saturday, November 28, 2015

Flannel & Lace Scarf

After my last Plaid & Lace Scarf (made from old shirts), I knew I wanted to make another one, but softer and bigger. I looked online and in-store for the perfect materials. Sure, it costs more than hitting up the thrift stores, but I got exactly what I was hoping for!


I bought 2 yards of the flannel fabric at fabric.com. I wanted to make sure I had enough for the length I needed to be able to wrap the scarf. I even have plenty extra that I might make a couple baby blankets with it.


The flannel is so soft and the colors are perfect for fall!
I cut out a piece approximately 9" x 72" to get the size scarf I was wanting.

I found the lacy material at Joann's; it wasn't exactly the 'lace' that I'd had in mind, but when I saw the stitching on it, it matched the plaid so nicely that I couldn't pass it up! Rather than buy another two yards of that, I just stitched two pieces together.


I sewed the flannel and lace into a long tube, gave it one twist, then sewed the ends together. The twist makes it so both materials show once I put the scarf on.

It could not have turned out more perfectly!

Sunday, November 1, 2015

Fall Candle Holders

I'm so excited with how awesome these candle holders turned out!
Last year, my sister decorated some jars with colored rice and un-popped popcorn; I thought it was so pretty and wanted to try it this year.


I started by mixing uncooked, white rice with a couple drops of food coloring and a couple drops of rubbing alcohol. (If you're worried about kids or pets getting into it, I read that white vinegar will also work.) I kept some white rice and made yellow and orange for the traditional candy corn colors. I laid the colored rice out on paper towels to let it dry completely. If you use vinegar, it will need a lot longer dry time; that's why I decided on the alcohol - plus, the rice for this project will be completely sealed off.

I headed to my area dollar store and craft stores to find a perfect, candy-corn-shape container... It ended up being some wine glasses turned upside down - perfect for a candle holder!
For a base, to hold the rice in, I found some round mirrors that were just a bit larger that the glasses, but would work well anyway.


Pouring in the white rice first, then orange, then yellow, I had an upside down candy corn. I used my hot glue gun to glue the mirror on the top of the glass, then was able to turn the glass without any rice falling out.


Originally, I thought I'd leave the mirror visible, but I was a little fussy about the glue showing more that I expected.
Fortunately, I had some silk leaves that I had bought last year and never used, so I added those around the mirror and the ugly glue was hidden! Now I just have to remember not to pick them up from the top, just in case...

I think they turned out stunning! I sprinkled a few acorn and baby pine cones around the leaves to add to the fall look. I absolutely love them! Happy November, Friends.


Wednesday, October 7, 2015

Pumpkin Candy Dish

 Here's a super easy - seriously, less than ten minutes - craft and seasonal decoration!

I found this awesome pumpkin-shaped jar at Michael's. It was in the candle making section, but as soon as I saw it, I knew exactly what I would do with it... 
I walked over to the floral section and found green coil wire, spotted a bag of candy corn near the checkouts, and got in line.

Once I was home, I washed the jar, then wrapped the wire around the top a couple times, leaving several inches on each end. I used a pencil to wrap the ends of the wire around and create spirals - now I had a pumpkin jar to fill with candy! 

I know some of you are judging me right now because, "candy corn is gross." I'll admit though, I enjoy a little sometimes; even if you don't eat candy corn, it's still a cute dish for autumn!
Perhaps, you'd like to fill it with acorns, colored rice or [un-popped] popcorn, or Reese's pieces - any of those are great for fall decorating! If you feel like being more crafty, paint the outside of the jar; then hide whatever you like inside. 

I love how mine looks and would love to see yours, if you make one! 


Wednesday, September 23, 2015

Autumn Wreath


I know I've proclaimed my love for the fall season numerous times, but every year I just get so excited for it! This year, the warm weather seems to be holding out... still, today it's officially fall and I was ready to get some decorations out.


A couple years ago, I made my first wreath and blogged about it here.   [In fact, it was two years ago, yesterday, and my first blog post! Happy two year anniversary saruthdesigns!]   Well, that wreath got me through two fall seasons, but when I took it down last year, it was definitely weathered.

This year, I got to make a new wreath and I was super excited about it! I don't remember where I found it (a thrift store, probably), but I had this huge grapevine wreath (you could always purchase them at Joann's) that I couldn't wait to decorate with silk leaves and sunflowers. I went out to my local Joann store and bought a few more silk sunflowers and the beautiful burlap ribbon to make a bow with.


The wreath was so gorgeous with just the leaves and sunflowers tied in!

I debated for a bit whether to add a bow or not, but in the end, I loved the ribbon so much that I had to make one.
I tried several different ways of making a bow before I realized that it's really so much easier to just cut the pieces and glue them - you get the perfect bow every time.
  

I was pleased with how the bow turned out, definitely adding to the eye appeal of the wreath as a whole. I added in a few more strands of ribbon to bring it all together.

Happy Fall Y'all!


Friday, November 14, 2014

Patchwork Pumpkin Pillow

It seems that after Halloween, retailers jump right to Christmas. Anything fall related - leaves, pumpkins, etc. - goes on clearance and the ornaments and lights come out. Thanksgiving tends to get a little passed over; and yet it's probably my favorite holiday. Don't get me wrong, I love Christmas decorations too, but the fall leaves aren't completely gone yet.

So hold off on your Christmas decorating, here's another project for fall.


I got the inspiration for my pillow from Knock Off Decor - a great place to find ways of making your own, less expensive version of name/store brand decor.
In this post, they are showing off Angie's pillow that was inspired by a pillow she had seen at Pottery Barn. If you would like to see the pictorial for Angie's no-sew version, just follow the links above or via the photo on the right.

While I absolutely love both of these pillows, I decided that I wanted some color in mine. I got additional inspiration I needed from Etsy when I found this patchwork pumpkin clip art from CherriesArtsnCrafts -


I just thought this patchwork look was too cute to pass up; and I already had some great prints to work with for my fabric pumpkin. I couldn't wait to get started!


I probably could have hand drawn a pumpkin shape faster than it took me to print this one, but I really liked the shape of the one I found at donteatthepaste.com.

First, I cut out the whole pumpkin shape in the solid orange material; then I cut out the sections of the pumpkin to use on the patterned prints.

I'm a huge fan of Heat-n-Bond for crafts like these, so I applied it to the material and then cut out the shapes and ironed them in place on the orange base.

I also cut out a green print stem and ironed it onto the front of the pillow case. Rather than using the Heat-n-Bond to attach the whole pumpkin to the pillow case, I did a quick stitch around the edge. If you want to keep it a no-sew project then the Heat-n-Bond would work just as well.

Finally, I was ready to apply the twine - my favorite part of the pillow I'd found at Knock Off Decor!
Using fabric glue, I slowly positioned the twine a little at a time and added glued it down. This part got very messy and I had to keep getting up to wash the glue off my fingers.

The end results were definitely worth the mess and time spent - I even decided to add some leaves on the vines with the same green print I had used for the stem.

A perfect patchwork pumpkin pillow!


As they say at Knock Off Decor, I hope this inspires you - and if you make your own, I'd love to see it!


Tuesday, October 21, 2014

Fall Leaf Pillow

I love my Christmas Tree Pillow (if you haven't seen it, you should check out the link); and while I was making it last year, I got the idea to make this leaf pillow. I love the colors of fall leaves, love seeing them fall from the trees, love hearing them crunch beneath my feet, so I thought I should bring some of that inside this year...


One of the things I loved about this craft is that I didn't have to go out and buy any material - I had it all from different sewing projects that I've done, or plan to do. It was a great project to start a couple days ago when the weather was too "bleh" to be outside.
This is done very similarly to the Christmas Tree Pillows, so if you like, take a look at that post first.

I used cookie cutters to get the shape of the larger leaves! And drew my own stencil for the small ones. Apply Heat-n-Bond (iron-on transfer paper) to the material before cutting out the leaves - this will help the material to fray less around the edges. You can trace the leaf shape before of after the heat-n-bond; I did it both ways so that the leaves wouldn't all be the same direction.

After I had cut out each leaf, I started playing with an arrangement, but I left the backing paper on until I was ready to iron the leaves onto the pillow case.

>> If you like super-easy, no-sew projects, grab a pillow case or plain pillow and iron away!

Since I wanted a pillow case to fit the same pillow as my Christmas Tree Pillow, I was going to have to measure and sew it.

I bought this beautiful flannel material months ago from the remnants bin at Joann Fabric's. I've been on a flannel-buying-kick for over a year now to make lots of baby gifts (see the Baby Crafts link at the top of the page). For some reason though, I haven't been able to pair this flannel up with too many baby prints. Lucky day for me - I had just enough of the fabric for this pillow case!
I like the easy, 3-piece pillow case - fold open the back and slide the pillow in. It's probably the second easiest way to make a pillow case (the easiest being just two pieces and leaving the side open). First, measure and cut a piece for the front, then cut another piece the same height, but a few inches longer. The long piece gets cut in half with the inside edges hemmed to create the back flap - there should be an inch or more overlap so that there's no gap once the pillow is stuffed inside. Pin it all together inside out, sew around all four sides, then turn it right-side out.
The back flap is a little loose on mine, so I'm thinking about grabbing some leaf buttons to hold it in place, but I'm not sure about doing button holes...

Once the case was done, I ironed it flat and began positioning and ironing-on the leaves.

As it came together, I decided to make a couple more small leaves to fill in a few spots. I wanted it to look like the leaves were falling down into a little pile, without overlapping the leaves too much that they wouldn't stand out by themselves. I think it turned out perfectly!

It's a bright, beautiful fall day inside no matter how cold it's getting outside. And after Thanksgiving, I can take this pillow case off and put on the Christmas tree pillow case


Do you think you'd make one? Would you keep it or gift it?

If you love this, let me know; I'd love to see what you make!


Wednesday, October 1, 2014

Crock Pot Applesauce

I read somewhere that apples are fall's favorite fruit. 
I personally have a lot of "fall favorites" - it's the season with some of my favorite memories from growing up. One of those memories is of apple picking with my family. (I shared a great photo from 20 years ago on a previous entry - if you missed it, check it out in Tomato Sauce.) 
This year, it was just me and a friend, but I just wanted to pick apples for the tradition and enough to make some tasty crock pot applesauce! Of course I picked a few extra for eating; a few more for some apple crisp; oh, and a couple more for some amazing bread... and then a coworker shared a recipe for apple brownies (I know, what?! But they were delicious, more like a coffee cake than brownie). 
Oh, the unending choices of what to do with apples! Until work gets in the way...

Back to the applesauce...
I found a recipe on Pinterest (really, where else would I look?) for crock pot applesauce and while I don't find stove-top applesauce extremely difficult, I liked the idea of using a crock pot so that I didn't feel like I'd have to check on it as often.
The recipe is from another blogspot blogger at Mommy Makes it Better: Crock Pot Applesauce


Like any good cook, I adapted the recipe a little. Essentially, I peeled and cut up enough apples to fill my crock pot; and I added some frozen peaches and strawberries. Then I added about a teaspoon of lemon juice, five teaspoons of brown sugar, and sprinkled cinnamon over the top.


Place the crock pot on "low" and let it simmer about 6-8 hours, stirring occasionally.
Once it looks like applesauce, mash the larger chunks or use a blender if you like less chunky.

I found that adding the strawberries made it a little more tart, but you can always add sugar and/or cinnamon to taste after the applesauce is done.


This made about one and a half quarts; which I've got in my refrigerator ready to take to work every day!

Think you'll try this recipe? Let me know!
Have another favorite apple recipe? Feel free to share; I'd love to try it!


Tuesday, September 23, 2014

Pumpkin Cream Cheese Snickerdoodle

Happy Fall and Welcome Pumpkin Everything!

I just shared "The Best Snickerdoodle Cookies" and had another snickerdoodle cookie that I wanted to share. I've gone from zero interest in snickerdoodles, to seeing what other delicious sounding recipes are out there; pumpkin seemed an obvious choice for this time of year.

Have you ever had a recipe that you both loved and hated equally? Unfortunately, this is that kind of recipe for me. Everything about these cookies looks amazing, until you have to put them together. First, there is a list of 18 ingredient measurements, for 3 different steps in the recipe. Then layering the cookie dough and filling is a very sticky, messy ordeal. Finally, my cookies took almost 30 minutes to bake!
Now, by no means am I saying the end results are not worth the process - this is an amazing cookie - however, it's one that I probably won't be messing with again.
It's another recipe from Alyssa at the recipe critic. She's got beautiful pictures of the finished cookie and the perfect recipe to make them.

I followed the instructions to a T, but it certainly wasn't as easy as it reads. I expected the cookie dough to firm up like sugar cookie dough after chilling, but it was just as sticky as when I'd first mixed it. The dough stuck to my hand, the counter, the baking sheet, as I tried to flatten out the tablespoon for each layer. After a few attempts, I got out a piece of wax paper, sprinkled the cinnamon sugar mix on to it, and then put the dough on top so at least it was only sticking to my hands.
I tried to keep the cookies on the small size, but they baked larger so that I could only fit 6-8 cookies on the baking stone. And then I had to wait 25-30 minutes before they were done and I could start the next sheet.

I'm not trying to write a 'hate' blog -  if you love pumpkin and cream cheese then you should try this recipe. It is absolutely a perfect combination cookie. It has a slight crunch to the outer shell, then a super soft, creamy center.
My sisters were begging me to make them again for the holidays.

After reading through the comments following Alyssa's blog, I see that a lot of people had the same frustrations.
One says: I personally would file this under “the most frustrating cookies you will ever love”.
And another: I have always found Snickerdoodle dough sticky & difficult to work with…but definitely worth it in the end!

So, I'll leave the choice with you. If you plan on trying them, prep what you can the night before, plan on a couple hours the day of baking, and make a lot if you want them to make it through the day without being eaten up!
As for me, I think there are a lot of other pumpkin recipes that I'll be trying before I make this one again.

Happy Pumpkin Baking!


Sunday, September 22, 2013

Jump into Crafting


My favorite season is, without a doubt, fall. I love to see the leaves change to their brilliant colors. I love the sound of the crunch beneath my feet. I love warm, breezy days and cool nights.


Here’s my “nephew” jumping off the sidewalk in front of my apartment. He loves to be outside whatever the season!


Fall is a wonderful start to a craft-full season. Autumn decorations, Halloween costumes, Thanksgiving foods, paper snowflakes and other Christmas trimmings are all perfect opportunities for creativity!
This year I decided to make a wreath; did you see it (above) hanging on the door? Here’s a close up:
I absolutely love the way it looks!
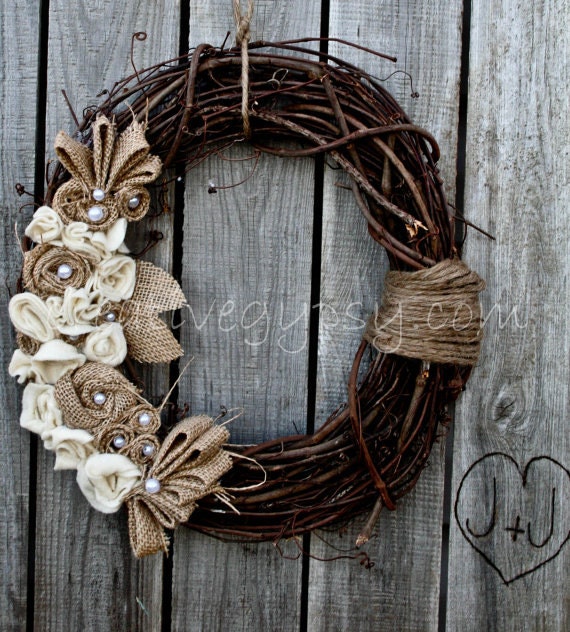
I got the idea while browsing “DIY” on Pinterest; and found one on Etsy for $35. But it didn't cost that much to make mine - $5 for the grape-vine wreath, $8 for the sunflower (I found others a bit cheaper, but liked this one best), $3 for the ivory “bead” string, and around $6 for a roll of 2” wide burlap - I bought all on sale and/or with coupons and have leftovers. I started out attempting to make burlap flowers, but I have a short supply of patience and after just two I didn't want to make any more… 
So, if you like to save time, buying it on Etsy is a nice option:
SALE Rustic Rancher Wreath Pre-Order
(Rustic Rancher Wreath by The Creative Gypsy)