Showing posts with label baking. Show all posts

Wednesday, January 7, 2015

Cold Weather Dinners

Today is a very cold day where I live, single digits with a windchill on top. Brr!
Even though I don't love the cold, it's the prefect time for some great "warm-me-up" meals. So, I thought I'd share a few that I've made since the weather turned chilly.

Scalloped Potatoes and Ham - a favorite Wegmans' recipe found here.
     I should probably let you know right off the bat that these aren't "healthy" dinners, per say... this scalloped potatoes recipe uses a full quart of heavy cream! I'm sure there are lots of healthier recipes out there, but this one is so creamy and delicious that I can't turn it down.
     Even though the recipe doesn't call for it, I always add the ham.
     I like to pair it with green beans; and always a piece of peanut buttered bread - it's something my Mom always did.


Zuppa Toscana Soup - an Olive Garden copycat recipe found here.
     Ok, if you're on a diet then you might not like this post very much, because this recipe uses heavy whipping cream; but only a cup for a whole pot of soup...
     Rather than dicing the potatoes like Siggy Spice, I followed my sister's recommendation to slice them (she used to work at Olive Garden). She also said she usually omits the bacon - I know, "bacon makes everything better" right? But in this case, my Facebook friends and I agreed that it would be better without bacon.
     Finally, I decided to use a mild Italian sausage (since I don't usually like it hot) and it was perfect!
     I paired it with some warm, homemade bread.


Meatloaf and Mac&Cheese - these are homemade recipes that I haven't figured out exact measurements for, I usually just mix as I go... But I'll do my best to write it down for you below the photo.

For the 'base' of my meatloaf I follow the recipe in my Better Homes and Gardens cookbook; also found here - 2 eggs, 3/4 cup milk, 2/3 cup bread crumbs, and 1 1/2 lbs. ground beef.
After that, I add whatever I have that sounds good - seasonings, onions, carrots, bacon, etc.
Bake in a bread pan at 350° F until internal temperature reaches 160° F. When it's almost done (maybe 10 minutes left), I add ketchup and/or barbecue sauce to the top.

Homemade Mac&Cheese (the way my Dad likes to make it):
     Step 1 - Choose your favorite pasta noodle and cook about 8 oz. to your preferred done-ness.
                Drain and rinse with cold water, or mix a little butter in; set aside.
     Step 2 - Pour about a cup of milk into a  medium sauce pan; add about 4 tablespoons (half a stick) of butter; salt and pepper to taste; and, if you like, a bit of garlic powder and dried parsley.
                Heat on low-med until just boiling; reduce to low heat.
                Stir in 6-8 oz. of Sharp Cheddar Cheese one handful at a time; continue stirring until melted. (The mix as you go applies here. You may want your cheese mix creamier or thicker, so add milk and butter to thin or add cheese to thicken. Just remember to only add small amounts and stir continuously.)
     Step 3 - Combine pasta and cheese sauce, then pour into baking dish.
                Bake at 350° F for approximately 30 minutes.

And for the new recipe in the picture Sweet Potatoes & Pears! I found this recipe in a Redbook magazine that I get monthly (not sure how, because I never ordered it and no one has admitted buying it for me; but it's got my name and address on the label and I'm not complaining). Since I can't find it on their site, you can see it on my Pinterest board here. I also might have added a couple tablespoons of brown sugar to mine - yummy!


 Chicken Pot Pie - an "impossibly easy" Betty Crocker recipe found here.
     I mean, really, this recipe is a no-brainer. Grab a can of cream of whatever soup (or I used sausage gravy!), pick your veggies (whether fresh or frozen), add some cooked chicken, and pour the baking mix on top. I love how easy and tasty it is!


Thanks for checking things out - I hope these recipes help keep you a little warmer this winter!


Friday, October 17, 2014

Zucchini Banana Muffins

[This post is typed in pink in support of October being Breast Cancer Awareness Month.]

Last summer I couldn't pin enough new zucchini recipes to keep up with my zucchini plants. This summer, I was getting zucchini from my sister, since my plants didn't do well at all. This is a wonderful recipe that I pinned from Jessica at "How Sweet It Is". Her blog is absolutely gorgeous, full of pictures that I don't even think to take when I'm baking (and I love taking pictures of food)!
This is my second time making these delicious, healthy muffins and I ended up adapting the recipe a bit this batch. I did some substitutions and additions and they came out great. I'm sharing the recipe that I ended up baking and the one picture I took.
But seriously, check out Jessica's blog and tasty pictures!
Whole Wheat Zucchini Banana Chocolate Chip Muffins | How Sweet It Is

If I were to put all the main ingredients in the title of this recipe, I would have to call them:
Whole Wheat Zucchini Banana Applesauce Walnut Chocolate Chip Muffins.


     3 c. whole wheat flour
     1 c. all purpose flour
     2 tsp. baking soda
     1/2 tsp. cinnamon
     1/2 tsp. salt
     
     2 large eggs
     2/3 c. packed brown sugar
     2/3 c. milk 
     1 Tbsp. vanilla extract 
     1/2 c. butter, softened (one stick)

     1 1/2 c. zucchini, grated (do not squeeze dry)
     2 small-medium bananas, mashed
     1 c. applesauce

     1 c. crushed walnuts
     1 c. chocolate chips

Mix the first 5 dry ingredients together and set aside.
In a large bowl, beat eggs and brown sugar until smooth. Add in milk, vanilla, and butter; mix until smooth. Stir in zucchini, bananas, and applesauce. Slowly, mix in the dry ingredients. Then add desired amount of walnuts and/or chocolate chips.
The zucchini and fruit measurements are an approximation of what I mixed in. If the batter appears thick or clumpy (mine did the first time I made it because I had packed the zucchini too much in the measuring cup), you can add more applesauce or milk til you see the right consistency. Applesauce is often used as a substitute for oil, so it will make the muffins more moist. If it seems too 'soupy' add a little more flour.
Line muffin tins with liners and fill about 2/3 - 3/4 full with batter.
Bake at 350°F for about 17 minutes or until golden brown and toothpick comes out clean.
Let muffins cool completely before eating.

These muffins make a quick, healthy breakfast. The recipe made about 30  muffins and I froze most of them so I can just grab a couple on my way to work when I don't have time for anything else.

Play with the ingredients to find what you like best - I've made similar muffins that also had carrots and raisins in them and couldn't believe how amazing they were packed with healthy foods! If you want some more zucchini recipes, check out my pinterest board "Eat It!"


Tuesday, October 14, 2014

Wedding Cake

When my brother got engaged, he and his fiancee knew they had some fast planning to do - about 6 months! They were fine with a simple wedding and small reception. They asked me if I would make them a cake just so they had something to cut - not big enough for the 100 or so guests. I had made a tiered cake last year for my sister's baby shower, so I figured I could do the same size for the wedding.

As promised, I'm now sharing the pictures --
It took us a while to all agree on something. She wanted sunflowers, but for it to all be edible (so no real or silk flowers on the cake). He wanted didn't want anything too elegant, but with swirls or paisley that would go with the print on the groomsmen's vests. It had to be a two-layer round cake (because that's what I had the pans for). We pinned and reviewed a lot of wedding cake pictures.

About a month before the wedding, I did a practice run (picture at the top). I just baked two 6 inch rounds and did what the top layer of the cake would look like.
I certainly can't make two identical cakes, and I hate to say it, but I liked the practice cake quite a bit better than the final cake. Although, everyone at the wedding saw only the final cake and I received many compliments. The final cake was still very pretty.

I used two layers of 9 inch cakes and two layers or 6 inch cakes, all chocolate as per the bride's request.
I don't make cakes from scratch very often; a box mix works and tastes just fine to me. The icing was also purchased from a store. (Normally, I would make my own icing, but I wanted a little more time and less stress.)


I've never worked with fondant, so I wasn't going to start now. However, it takes a lot of practice and patience to get icing smooth and I wanted it as smooth as could get it. And when I'm icing a cake, I have to remember that a lot of things will be covered by the decorations on the cake and even if they aren't covered, as a whole, most of the 'less smooth' areas won't be noticeable by anyone other than me.
I iced the tiers separately, each with a cardboard base; then I [carefully] plopped the top layer on.
My sister asked me how long from start to finish the cake would take me, trying to get an idea of why special cakes cost as much as they do -- I estimated 4 hours. With the cake mixing, baking, cooling, cutting the tops flat, color mixing, and decorating, I think it took me longer than that. The decorating alone (after what you see in the picture above) took a little over two hours. A professional, or someone who makes special cakes a lot more often than I do, would probably be quite a bit faster.
But it all paid off (no pun intended, the cake was a gift from me).


And they loved it too --

For my baby brother and his wife:

all my love and best wishes for a marriage that is

as beautiful and happy as your wedding day!


Tuesday, September 23, 2014

Pumpkin Cream Cheese Snickerdoodle

Happy Fall and Welcome Pumpkin Everything!

I just shared "The Best Snickerdoodle Cookies" and had another snickerdoodle cookie that I wanted to share. I've gone from zero interest in snickerdoodles, to seeing what other delicious sounding recipes are out there; pumpkin seemed an obvious choice for this time of year.

Have you ever had a recipe that you both loved and hated equally? Unfortunately, this is that kind of recipe for me. Everything about these cookies looks amazing, until you have to put them together. First, there is a list of 18 ingredient measurements, for 3 different steps in the recipe. Then layering the cookie dough and filling is a very sticky, messy ordeal. Finally, my cookies took almost 30 minutes to bake!
Now, by no means am I saying the end results are not worth the process - this is an amazing cookie - however, it's one that I probably won't be messing with again.
It's another recipe from Alyssa at the recipe critic. She's got beautiful pictures of the finished cookie and the perfect recipe to make them.

I followed the instructions to a T, but it certainly wasn't as easy as it reads. I expected the cookie dough to firm up like sugar cookie dough after chilling, but it was just as sticky as when I'd first mixed it. The dough stuck to my hand, the counter, the baking sheet, as I tried to flatten out the tablespoon for each layer. After a few attempts, I got out a piece of wax paper, sprinkled the cinnamon sugar mix on to it, and then put the dough on top so at least it was only sticking to my hands.
I tried to keep the cookies on the small size, but they baked larger so that I could only fit 6-8 cookies on the baking stone. And then I had to wait 25-30 minutes before they were done and I could start the next sheet.

I'm not trying to write a 'hate' blog -  if you love pumpkin and cream cheese then you should try this recipe. It is absolutely a perfect combination cookie. It has a slight crunch to the outer shell, then a super soft, creamy center.
My sisters were begging me to make them again for the holidays.

After reading through the comments following Alyssa's blog, I see that a lot of people had the same frustrations.
One says: I personally would file this under “the most frustrating cookies you will ever love”.
And another: I have always found Snickerdoodle dough sticky & difficult to work with…but definitely worth it in the end!

So, I'll leave the choice with you. If you plan on trying them, prep what you can the night before, plan on a couple hours the day of baking, and make a lot if you want them to make it through the day without being eaten up!
As for me, I think there are a lot of other pumpkin recipes that I'll be trying before I make this one again.

Happy Pumpkin Baking!


Thursday, September 18, 2014

The Best Snickerdoodle Cookies

I never thought I liked snickerdoodle cookies; or at least they were never something I thought to buy or make, until this year...


I take a vacation with a wonderful, diverse group of friends twice a year. This last winter vacation, I
decided to make several dozen cookies (and a few loaves of bread) for the group to snack on over the weekend get-together. I never could have guessed how much snickerdoodles would be missed; or how much I would be [lovingly] harassed for not making such a common favorite cookie - I had no idea they were a "staple" cookie!
I wasn't going to make the same mistake for our summer vacation when I was asked to "kindly grace [them] with [my] talents in cookie and treat baking."
If I was going to make snickerdoodles, I needed to find a recipe that sounded good to me. My prior thoughts on snickerdoodles were that they were a thin, crispy cookie, lacking in much flavor other than cinnamon - I like most cookies to be soft, chewy, and chunky with flavors.

I think I typed in something like "best snickerdoodle recipe" on Pinterest and quickly discovered pudding cookies - oh my! The blog post I found claims "7 of the best pudding cookies". This recipe changed my lack of interest for snickerdoodles into love and gave me a new "staple" cookie for holiday baking. I even raved about the recipe on Facebook:


It had me at "white chocolate" and kept me hooked. I could type out the recipe here, but why mess with an already perfect place to get it? I couldn't agree more with everything Alyssa (the recipe critic) has to say about the cookies. (And I'll just add that I wish I had all the time to make the recipes she's discovered!)

Since the summer, I've made them again - a double batch - for girls weekend, to share with family, and to share with coworkers. Needless to say, everyone loved them. I have several requests to make them again - and I definitely will!


Wednesday, August 27, 2014

Cake Decorating

I've gotten a lot of use out of my cake decorating skills this summer! Starting with my own birthday cake, I've also made cupcakes for my nephew's first birthday, my sister-in-law's wedding shower, and my sister's birthday! In the next two months, I'll be making a practice run and the actual wedding cake for my brother's wedding. It's nice to enjoy something like cake decorating.


I started learning cake decorating when I got a job with Wegmans' Bakery in 2008. It is definitely a skill that takes a lot of practice and for a while, I wasn't sure I was going to be able to make roses.
Once I became more familiar with decorating, I really started loving it.
The first cake I made outside of work was for my brother's graduation party in 2009 - the same brother whose wedding cake I'll be making in October. Since then, I've make a lot of cakes for special occasions, or just because. Pictured are some of my favorites.

With all the summer heat, cake icing tends to melt, fast. I had wanted to make a tiered cake for my birthday from an idea I saw on Pinterest (of course); however, not having air conditioning, the icing between the layers was too soft and made the cake slide. I ended up making this cake instead and it was still beautiful.


For the rest of the summer events we had planned, I decided to make some fun and fancy cupcakes.
I don't have a step-by-step pictorial, but I'll share what tips to use and a couple links that I found helpful. If you've never worked with decorating tips or just want more instructions, check out wilton.comYou can also check out my Pinterest board for lots of links.


Interestingly enough, the cupcakes, in order of each event, also go up in level of difficulty.

Nephew's 1st Birthday Sunshine Cake

This sunshine cake was made with a 9" round pan and regular sized cupcakes.
To make the cupcake icing swirl with colors, I divided red, orange, and yellow icing into the decorating bag.
(Icing cupcakes - http://www.wilton.com/technique/1M-Swirl)
I used a small star tip to make the 1 on the cake.


Tea Party Wedding Shower Flower Cupcakes

Lots of pretty flower cupcakes are perfect for an outdoor tea party!

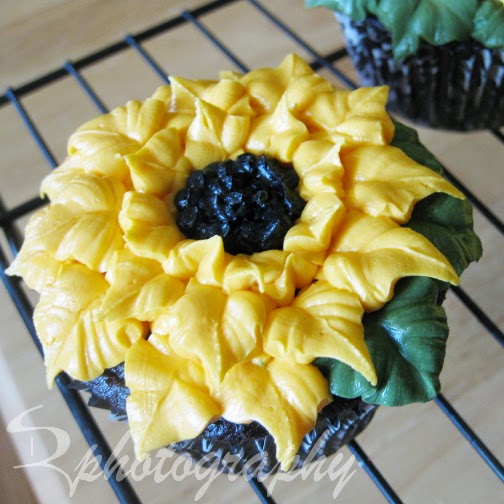
I used my large rose tip #125 for the roses and the poppies, a leaf tip (#366 or cut the bag to look similar) for the sunflowers, and a 2D star tip for the hydrangeas.

Click here for the rose technique - instead of icing on the nail, pipe the rose right onto the cupcake.

I followed Martha Stewart's technique for the poppies; again, just piping right onto the cupcake. (I did not refrigerate them.)

To make sunflowers, use the leaf tip and work your way from the outside; creating smaller circles and petals.

Here is a great pictorial on how to do the hydrangeas. It also has a picture for mixing colors in a bag (like I did for the sunshine cupcakes).


Alice in Wonderland Birthday "Painting the Roses Red" Cupcakes

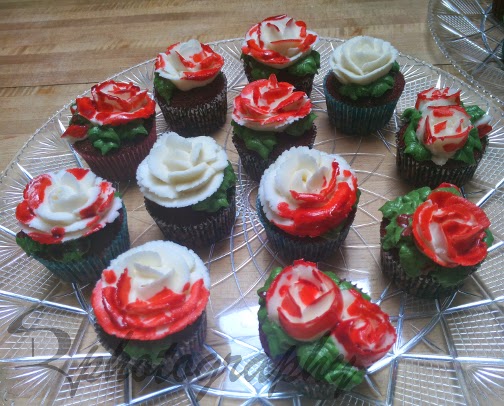
My sister has always loved "Alice in Wonderland" and the thought of doing a themed party. For her 30th birthday this year she finally planned the theme. She asked if I would be able to make cupcakes with white roses that looked like they have been painted red.
I figured that I could actually paint the red coloring onto a white rose for the effect, but it took a little experimenting. The icing for these roses had to be quite a bit thicker so that the flower stood up better and didn't 'wilt' when I put the paintbrush to it. The bright red coloring had to be watered down a little to help it spread better on the icing. And the combination actually made the roses still look wet - but watch out! it will stain if it gets on anything!

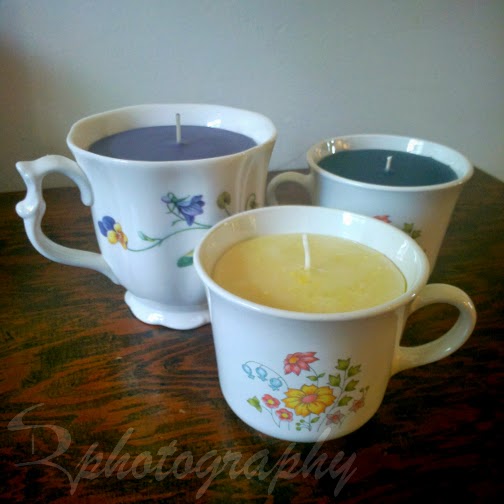
**Side note: remember the teacup candles that I made in July? I made some whimsical teacup candles to go with the Alice in Wonderland theme:


It's definitely been a fun and eventful summer. Now that it's winding down, I'm ready for fall - cooler weather, gorgeous colors, and pumpkin everything!
Don't forget to come back to see the wedding cake in October.


photo taken, at my request, by my sister; edited by me.

Thursday, February 13, 2014

Valentine Sugar Cookies


I'm going to share the best sugar cookie recipe I've ever used; granted I'm not the type to try a lot of different recipes - when I find a good one I stick with it until someone recommends a better one.

My sister got this recipe from the back of a butter box (if my memory is correct) and thought she'd give it a try. The results were super soft and almost fluffy sugar cookies. My favorite!

             For about 3 dozen cookies:
      1 cup butter, softened
      1 cup sugar
      1 egg
      2 1/2 cups flour
      2 Tbsp orange juice
      1 Tbsp vanilla
      1 tsp baking powder

Combine butter, sugar, and egg and beat at medium speed until creamy. Add remaining ingredients. Beat at low speed until well mixed. Place plastic wrap directly over cookie dough and refrigerate until firm (2 hrs or more).

Once the dough is chilled and ready - Preheat oven to 400°F. 

Roll and cut as normal for sugar cookies. 
Bake on an un-greased cookie sheet for 6-10 minutes (or more on stoneware).

Who knew orange juice was the secret ingredient to amazing sugar cookies?!
Make sure to roll out the dough about a 1/4" thick for softer cookies, but not too thick, or they fall apart when you go to frost them. 

Frosting:
   1/3 cup butter, softened
   1 tsp vanilla
   3 cups powdered sugar
   2-3 Tbsp milk

Beat butter on low speed until fluffy; mix in vanilla. Continue to mix, adding powdered sugar by the cup and gradually adding milk until desired consistency.

Be sure to let the cookies cool completely before frosting. 
I have used this recipe to make Christmas cookies with my boyfriend's nephews the past couple years and they love it too! They ask to make cookies throughout the year now and I wish I had more time to do just that. 
These heart cookies I made on my own; relaxing as I drew each fun design. I really do think cookie and cake decorating is relaxing if I'm not pressed for time!

Do you have a favorite sugar cookie recipe that you think I should try? Leave a comment; let me know!
Happy Heart Day!


Tuesday, December 24, 2013

Pear Gingerbread

If there's one new dessert you want to try this holiday, it should be this one! Oh my is it delicious! (And that's coming from someone who doesn't generally like gingerbread.)


I don't have the prettiest pictures of it, but I do have a pretty simple recipe. I got the recipe from a coworker a few years ago, and just got around to making it last Christmas Eve. It was a hit with everyone!

Pear Gingerbread
Bring the following ingredients to a boil, then pour into the bottom of a 9x13 pan:
     6-7 c.   pears
     1 1/2 c.   water
     1/2 c.   sugar
     1/4 c.   nutmeg
Mix the following together:
     2 1/2 c.   flour
     1/2 c.   sugar
     1 1/2 tsp.   cinnamon
     1 1/2 tsp.   ginger - dry
     1 1/2 tsp.   baking soda
     1/2 tsp.   cloves - ground
Mix the above set with the below set and then pour over the fruit:
     1 c.   molasses
     1 c.   water
     1/2 c.   oil
     1   egg
Bake at 350 for approximately 30 minutes.

Caramel Sauce
Boil the following ingredients together, stirring until caramel brown:
     1/3 c.   sugar
     3 TBSP   butter
     2 TBSP   water
Slowly add about 1 cup cream to hot sugar/butter mixture until desired consistency.
Pour the sauce over the gingerbread and enjoy!

Tuesday, October 29, 2013

October Cookie Party

In the last few years, I have been trying to have cookie parties throughout the holidays. I think that baking and decorating cookies with friends and family is a great way to get together, plus everyone else can take home cookies and I'm not left with too many when I just want a few!
I have fond childhood memories of making Christmas sugar cookie cutouts with my Mom and siblings; and family friends occasionally. My Mom loved to make cookies and deliver plates to our neighbors and friends. I remember making so many at a time that we would freeze them to make them last longer!
A few years ago, I spent a year working in a Wegmans Bakery learning (among other things) a professional way to decorate cutout cookies. Since I had so much fun as a kid with sugar cookies, this part of the job never seemed like work. I quickly realized there are so many more occasions that one can make cutouts for and started buying cookie cutters after the season, when they were marked down - hearts for Valentine's Day; eggs for Easter; a pumpkin or apple and a leaf for fall; and did you know you could use an egg shape to make turkeys?

After my younger sister moved back to the area last year, I decided to have a girls' night cookie party with my sisters and some friends. It was just after Halloween, so we did all the fall cutouts I had, some chocolate chip cookies, and a first attempt at coconut macaroons - yum! Later that night, I found out that I was going to be an Auntie!
   Now my precious nephew is four months old. And this past Sunday I invited my family over to have another cookie party. Since we're still in October, my sister brought her ribbon cookie cutter so we could decorate pink ribbons in honor of breast cancer research.
jack-o-lanterns and spiderwebs for Halloween
We were more ambitious than we had time for...
We made sugar cookies, oatmeal cranberry white chocolate chip cookies, and the dough for chocolate chip cookies. If you've never made the oatmeal cookies, you have to try them!
(Click the picture for the Ocean Spray recipe.)


There were no big announcements at the end of this night; and, after we got the kitchen cleaned up, I took out my Grandma's old cookie jar and filled it with the oatmeal cookies. 
Each 'house' got to take home cookies in little paper Halloween bags; and I put my sugar cookies on little Halloween plates.

I can't wait to share more cookie pictures and recipes with you for Thanksgiving and Christmas!

Sunday, October 6, 2013

Perfectly Pumpkin Cake

Fall-time means pumpkin everything and this is one of my favorite recipes!

Pumpkin Cake with Cream Cheese Icing

I find that one of the best things about cooler weather is being able to heat up the house with baking - and, of course, it smells great too! I made this cake one year for my Dad's birthday and it was a hit! (It was also the first cake I made completely from scratch.) As usual, I changed a few things to make it my own.

Pumpkin Cake
     2 c. all purpose flour
     2 c. sugar
     2 tsp. baking soda
     2 tsp. cinnamon
     1/2 tsp. salt
     4 eggs
     1 c. vegetable oil
     2 c. canned pumpkin
     1-2 c. chocolate chips

Combine flour, sugar, baking soda, cinnamon, and salt in a large mixing bowl; stir lightly. Add eggs, oil, and pumpkin. Beat with an electric mixer until thoroughly blended. Mix in chocolate chips.

Pour batter into a buttered and floured pan(s). 
Bake at 350°F for 30 to 40 minutes, or until cake tests done. Cool while preparing Cream Cheese Icing.

Cream Cheese Icing
     1/2 c. butter, softened

     1 (8 oz.) pkg. cream cheese, softened
     2 tsp. vanilla extract
     powdered sugar (about 1 lb.)

Combine butter and cream cheese in a mixing bowl. Beat with an electric mixer until smooth. Mix in vanilla. Add cupfuls of powdered sugar and blend slowly until desired consistency. 
Spread on cooled cake. Sprinkle with crushed walnuts (if desired).


Of course, you could really add several different ingredients to this cake to suit your taste buds. Instead of chocolate chips try raisins or cranberries, or a combination. I chose to put walnuts on the icing (because it's easier to scrape off for those who don't enjoy them), but they would be just as good mixed in with the cake batter - or try pecans. And if you don't like any of those, a plain pumpkin cake with cream cheese icing is still delicious!
So, if you have the extra time, I highly recommend making this pumpkin cake. Then, slice yourself a piece, relax, and enjoy!


Note: The original recipe that I followed can be found at cooks.com or by clicking the link in this entry's header.