Showing posts with label Christmas trees. Show all posts

Saturday, December 6, 2014

Seashell Christmas Tree


I can't help but walk through every aisle when I go to a craft store - and when the holiday items come out, it's like I could never leave the store! I like to think I'm practicing self control when I pick up and an item, then put it back on the shelf. But really, it's my ever nagging bank account in the back of my head saying, "you don't need that" or, "you could make that for a lot less." While those statements may be true, sometimes it takes me a lot longer to make it myself.

I saw a beautiful seashell tree at Michael's last Christmas season and picked it up, thinking how perfectly it would go in my seashell/beach theme bathroom. Naturally, the price tag gave me second thoughts. This was something I could make for myself - I didn't even need to buy shells, since I knew I had some packed away in my craft room, somewhere.
Yet, I didn't get around to making it til now -


Here's what I used
  • styrofoam cones
  • small seashells
  • hot glue gun
  • glitter spray


I made two styles and different sized seashell trees. For the larger tree, I used all the same type of shell and glued them on from the bottom up so that they overlapped at each layer. The smaller tree was all different shells and I glued them down like puzzle pieces - wherever they fit best.


I even glued some pointy shells together to make a "star" for the top.

           Once I had glued on all the shells, the trees were ready to be glitter blasted - making them look like they were covered in a fresh, sparkly snow!

Let it dry according to the glitter spray directions and it's done. It's just that easy! 


This is a perfection addition to your holiday decorations, whether you spend Christmas in Florida or just like to bring a little bit of the beach into your home.


Tuesday, December 2, 2014

Christmas Tree Card Holder


Not sure how to show off all the pretty holiday cards you get at Christmas time? Here's a gorgeous way to display them without taking up a lot of space!

I love sending and receiving Christmas cards each year, but every year I feel like I'm trying to find enough surface space to display them with all my other holiday decor. Sure, there are lots of other ways to show them off - my Grandmother used to tape them all to the front of the coat closet, or I've seen others hole punch them and make garland - but this is seriously the prettiest way I've seen yet.

I found the original idea from Ellie at Moda Bake Shop. Ellie's version requires a bit more hardware and power tools than my copy does, but hers is larger and probably sturdier. I had asked my Dad if he'd be able to cut some plywood into the triangle Christmas tree shape, but even though he's more than happy to help, he usually doesn't have a lot of spare time. I figured a foam board would work nearly as well and I would save some money!


I bought a piece of 20x30 in. foam board for just $2.99 and drew out the shape I wanted; I could even use the excess board to make a second card holder.


After I cut the tree shape out of the foam board, I used it to cut batting to the same shape, then I pulled out all my Christmas fabrics...

Rather than doing the quilting squares, like Ellie, I cut my fabric into triangular strips and sewed them together so that it looked a little more whimsical, Dr. Suess-ish.

Once I had the fabrics to the right size, I laid it over the foam board with the batting in the middle. I pinned the top corner in place (the sewing pins worked well in the foam board) and used a hot glue gun to secure the fabric.
Adding glue a little at a time, I tightened the material around the edges. When I got to the base, I cut the fabric along either side of the 'trunk' so that I could glue the bottom over and then tuck the 'trunk' section under itself.
I didn't bother trimming the fabric until it was completely glued down. Then, after trimming, I used fabric glue along all the edges to prevent fraying.

Honestly, you could stop here because even this makes a beautiful holiday decoration!


I was actually a little afraid to add ribbon to hold cards, worried that it might ruin how pretty it already was. I spent about two hours at different craft stores looking for the perfect ribbon that would tie it all together.
I didn't want a solid red or green ribbon, for thinking the tree would be "too red" or "too green." But I also couldn't picture it with a solid gold or silver ribbon. And a patterned ribbon would look too busy...
Finally, I picked out this burlap ribbon with a touch of gold edging. Since I had used burlap for the trunk, I thought the burlap ribbon would match nicely. 

Starting at the bottom, on either side of the trunk, I laid the ribbon down at what looked like a good angle. Then cut it long enough to glue the ends to the back of the board. I made sure that the ribbon was taught enough that I wouldn't need to tack it down at each intersection. With the two lowest ribbons in place, I used them as guidelines for the rest.
Then, for something to hang it on the wall, I braided some string and glued it across the back; since the foam board is so light, it didn't need anything super-duty to hold it up.

Once it was finished, I knew I had picked the perfect ribbon to make this the loveliest card holder I've seen!


It's fun, elegant, and colorful; and would go with any holiday decorations! I'm even more excited, now, to receive pretty, little cards and show them off.


What do you think? Will you be making this card holder or are you already loving how you display your holiday cards? You could always use this to display your favorite holiday photos. If you have another great card display, I'd love it if you shared! 


Happy Holidays!


Sunday, November 30, 2014

Ribbon Christmas Tree Towels

Remember the Ribbon Egg Towels I made back in March? I had said that I planned on making some with Christmas trees, but didn't want to think about winter just then. Well, winter is here and Christmas is just around the corner! These beautiful towels make great decorations, or great gifts!


This picture shows them in order of how I made them - First, I started by using the same process as with the Egg Towels, but working with thinner ribbon made it harder to work with the fusing tape. For the last two towels I tried the following method and loved how they turned out.

Here's what you'll need:

  • Towels
  • Ribbons
  • Heat-n-bond
  • Iron
  • Wax Paper
  • Scissors/Rotor Cutter


First, pick out the ribbons and the order that you want them for your tree, then cut them to about 5 inches. If you want a larger tree, more than 12 or so ribbons, you'll need to cut them longer.


Step 1
- lay the ribbons backside up on a piece of wax paper on your ironing surface. The Heat-n-Bond then gets applied. The wax paper allows the Heat-n-Bond to stick to something other than your ironing board or iron and is easy to peel off.

Step 2 - now you'll have a square of ribbons and you want to cut out the tree shape  
Step 3 - peel off the backing of the Heat-n-Bond. You should have a single piece with all the ribbons on it.
Step 4 - lay the ribbon piece right-side up on the towel where you want it adhered. Place a new sheet of wax paper over the top and iron-on. The wax paper this time, will lift off the extra Heat-n-Bond so that the towel is just lined with beautiful ribbons.


Lastly, I added a quick stitching of trim to the bottom of the towel to give it a little more holiday color.


So, what do you think - do you have some extra ribbon around to make your own?
These would make great gifts too!

Did you have a favorite style - 
the more boxed look of the first towel? no trim at the bottom of the second towel?

However you decide to make one, it will be beautiful!
Let me know how it turns out by leaving a comment or photo below!


Saturday, December 14, 2013

Candy Christmas Tree

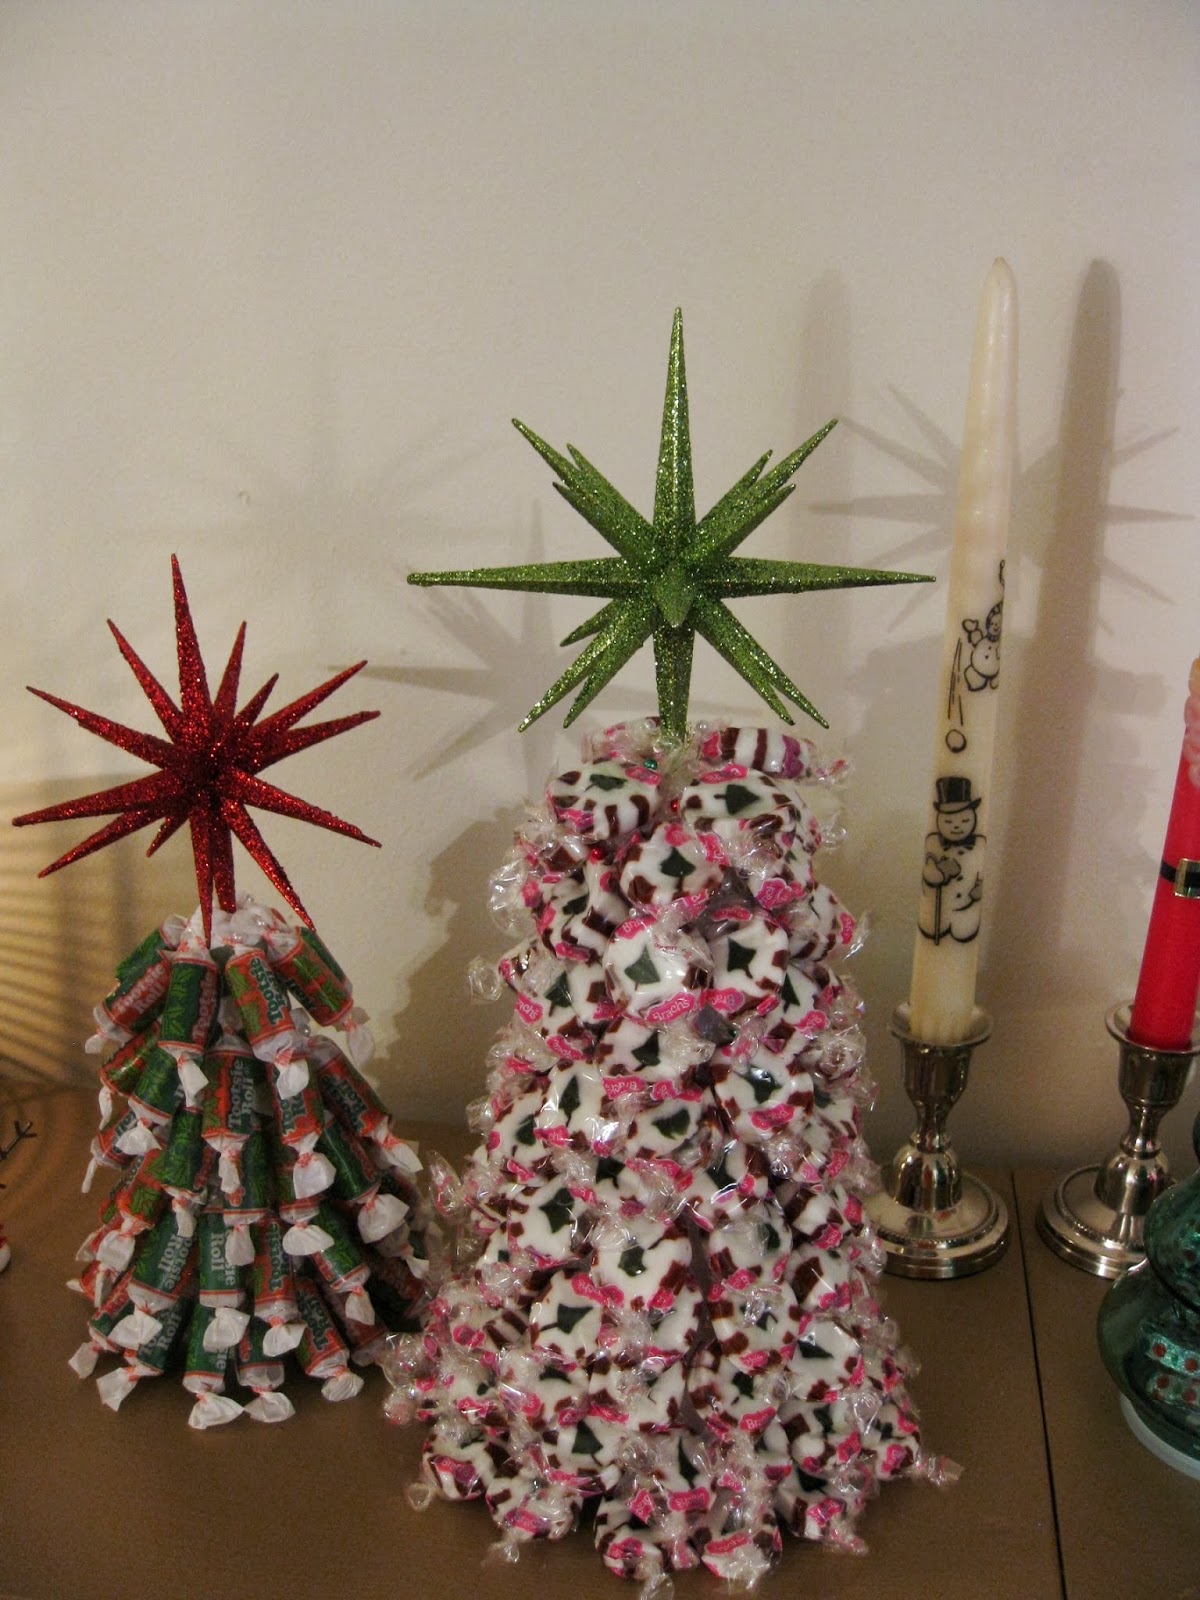
So, I told you all about the candy wreaths I like to make, but this year I decided to try something even easier - candy Christmas trees. Buy the styrofoam cones from your craft store and use sewing/floral pins to secure candy pieces. I thought it would be super easy, fun, and cute! I found the awesome star ornaments to use as a tree topper at Target.

A "sweet" holiday decoration!

Thursday, December 12, 2013

Christmas Tree Pillows

I got the idea for this craft when I saw a similar pillow in a Ten Thousand Villages store. I decided to make one for my sister (who had asked for pillows for Christmas to go with her new couch) and one for myself.
Here's a little picture tutorial on how to make your own Christmas Tree Pillow!

  First, pick out some fabric. I chose to use different green holiday fabrics for the trees with a plain red background, but pick out your favorite tree fabrics even if they are  "painted pink" the way Lucy van Pelt prefers. I also bought a black with white snowflake print that I thought would make a neat background.
Then start cutting out triangles. Try different sizes to create a visual depth for a forest, or try skinny and fat ones; it all depends on what size your pillow is. In the picture to the right, the blue squares are 1in.; I wanted my trees tall and skinny to fit on my long pillows.
Once you have enough trees for your pillow, cut out and apply Heat'n'Bond to the backs on the fabric to create an easy application of the trees to the background. Arrange the trees on the background and start ironing on the bottom layer first. I laid the trees out before peeling off the paper backs, then ironed each tree individually. However, you could try peeling off all the papers and ironing it all at one time. Also, I would recommend you take a picture of your layout before you start ironing, just in case you need to go back to it for a reference. (Maybe you get distracted from ironing with my blog and your kids or pets go over and move things around on you... or maybe I'm just a little o.c.d.)
After all the trees are ironed on, I reinforced them by sewing along the edges. I thought that this would keep the trees on better through multiple washings, while the edges could fray a little and add some nice texture.
    

Now the front of the pillow is ready!
Add whatever style back you like and you're all set.

  For the smaller pillow (the one pictured at the top), I put a zipper up the side and found some fun pom-pom trim to go around the pillow case. And I had a Christmas present for my sister -


For my pillow, I used white ribbon all the way around and, rather than try my luck with another zipper, I left the middle of the back open to fit the pillow into.


So now do you feel ready to make your own? If you do make one, share a picture with me; I'd love to see it!
I have a bit of extra fabric that I'm thinking about sewing into a Christmas quilt... maybe for next year.


Tuesday, December 10, 2013

Winter Wreath

Every December, I like to cut down a real evergreen tree for Christmas. It's a family tradition from my childhood; although, I remember there being a lot more snow than we have lately.

This year, I wanted to try my skill at making a wreath from the boughs cut off the bottom of the tree. I had a pretty full bag of cinnamon pine cones (that I bought last year and have since lost their scent) that I knew I wanted to incorporate; as well as some burlap ribbon. I found the flat wreath base that I wanted at Michael's - I was surprised my JoAnn's doesn't carry this item, only fat foam ones. I wanted the flat wooden one so that I could glue the pine cones on, rather than try to use floral wire or pins. I did use floral wire to hold the boughs on.
It didn't turn out quite as I had pictured, but it's pretty close. I just switched out my fall wreath and I'm ready for the holidays; or at least my front door is.